
:workspaceId, :projectId, :assetId, and :collectionId. When you are ready to follow a guided setup flow, see Getting started.
Workspaces - /workspaces
/workspaces) is the first screen you see after signing in. It lists every workspace you belong to as a card grid. Select any card to enter that workspace, or choose New Workspace to create one. Use a client, brand, or team name so the workspace is easy to identify at a glance.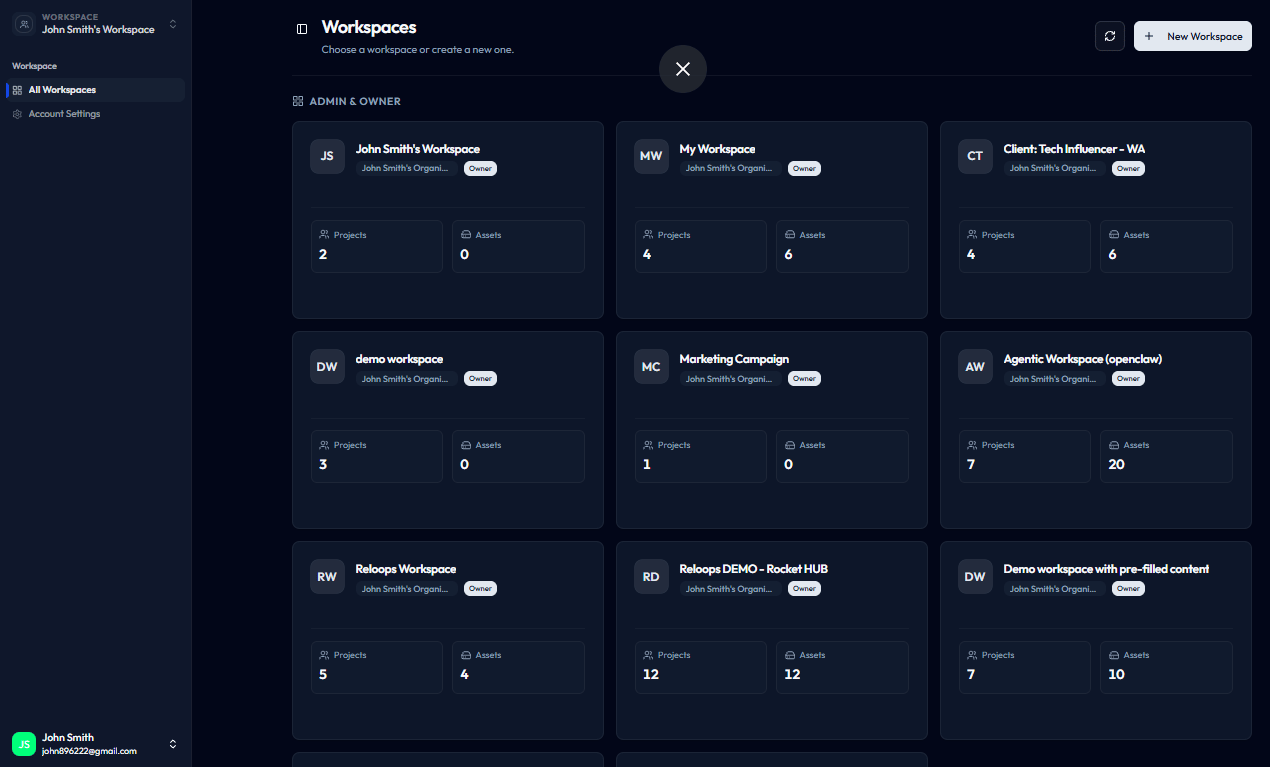
The workspaces index lists every workspace you belong to.
Projects - /workspace/:workspaceId/projects
/workspace/:workspaceId/projects) shows all the projects inside a workspace. Each project card displays the project name and a summary of its assets. Select a card to open the project, or choose New Project to start a new body of work.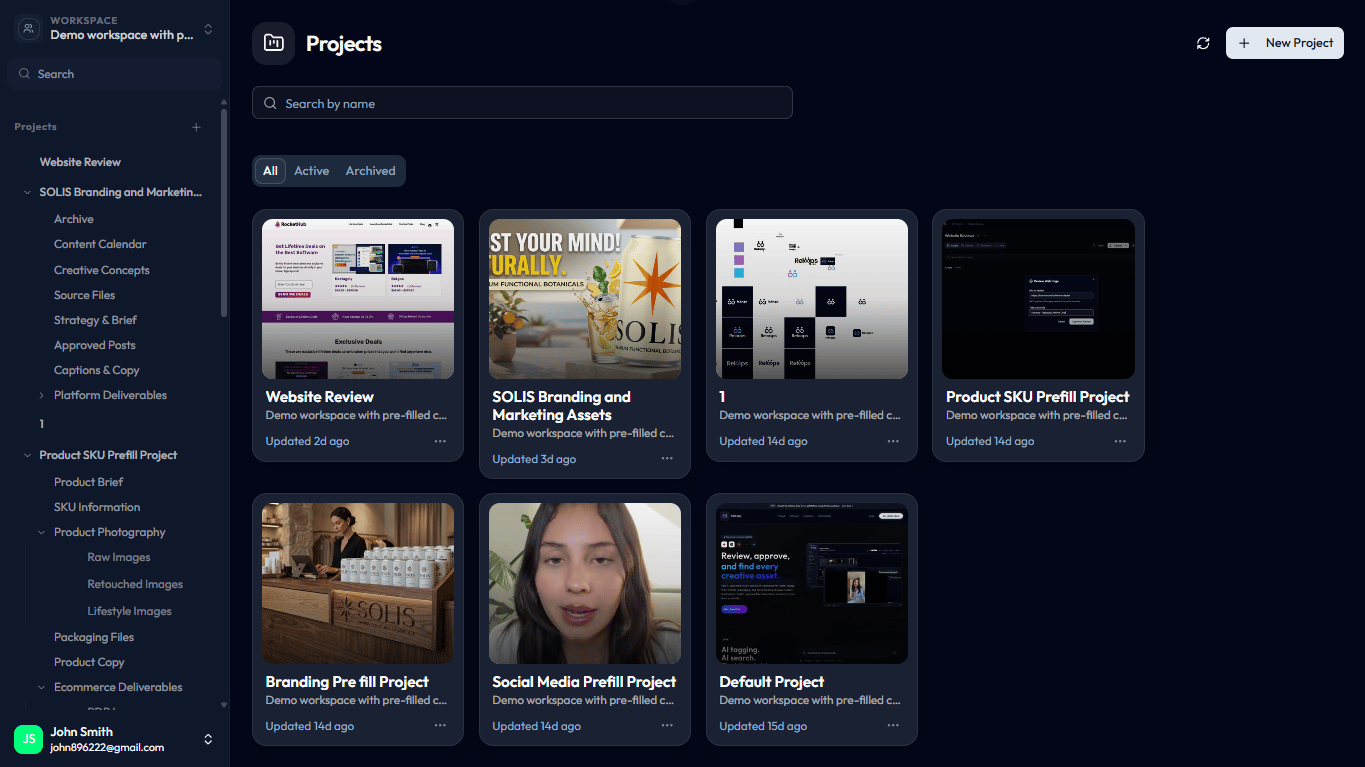
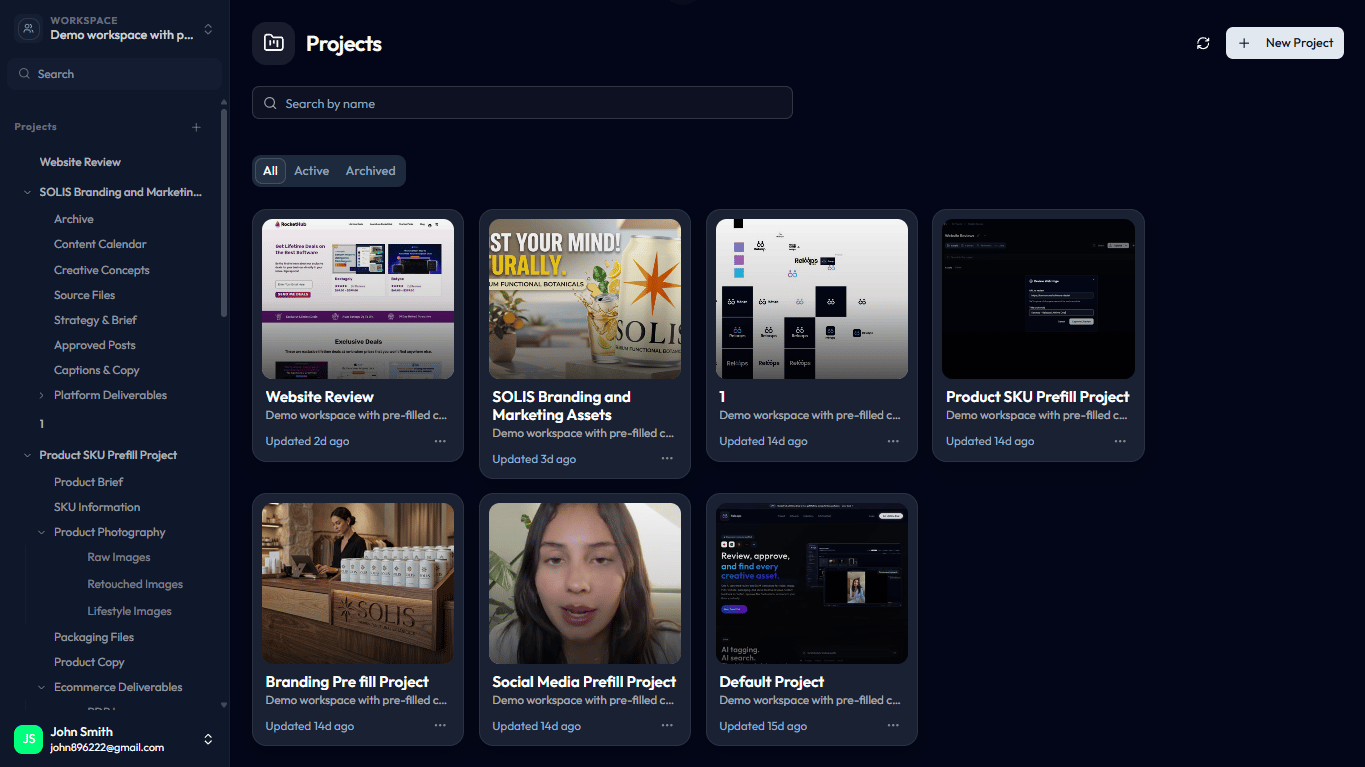
Project cards give each workspace a high-level project index.
Create a Project - /workspace/:workspaceId/projects
/workspace/:workspaceId/projects) opens when you select New Project. Choose a blank project or pick a template - such as Social Media - that pre-populates folder structure and asset statuses. Enter a project name, then confirm to create the project.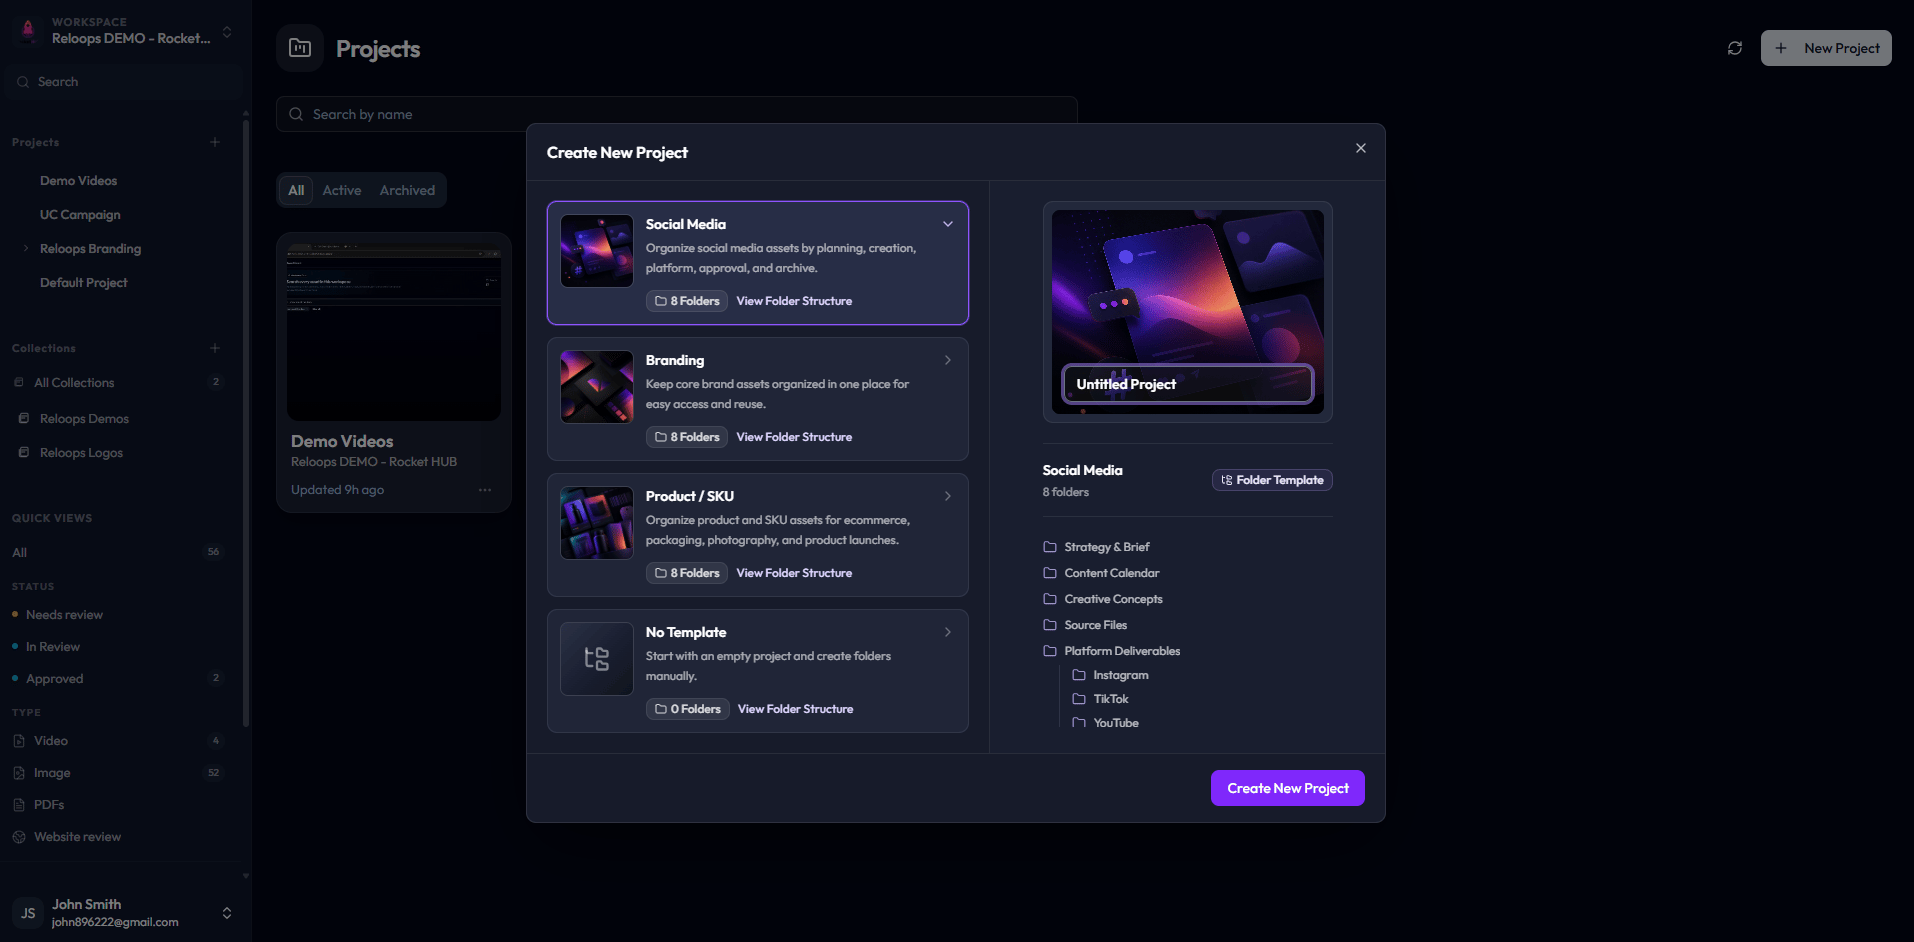
The Social Media template starts a project with prepared campaign folders.
Project Assets - /workspace/:workspaceId/projects/:projectId
/workspace/:workspaceId/projects/:projectId) is the default view inside a project. It lists folders above asset cards. Select any asset card to open it for review.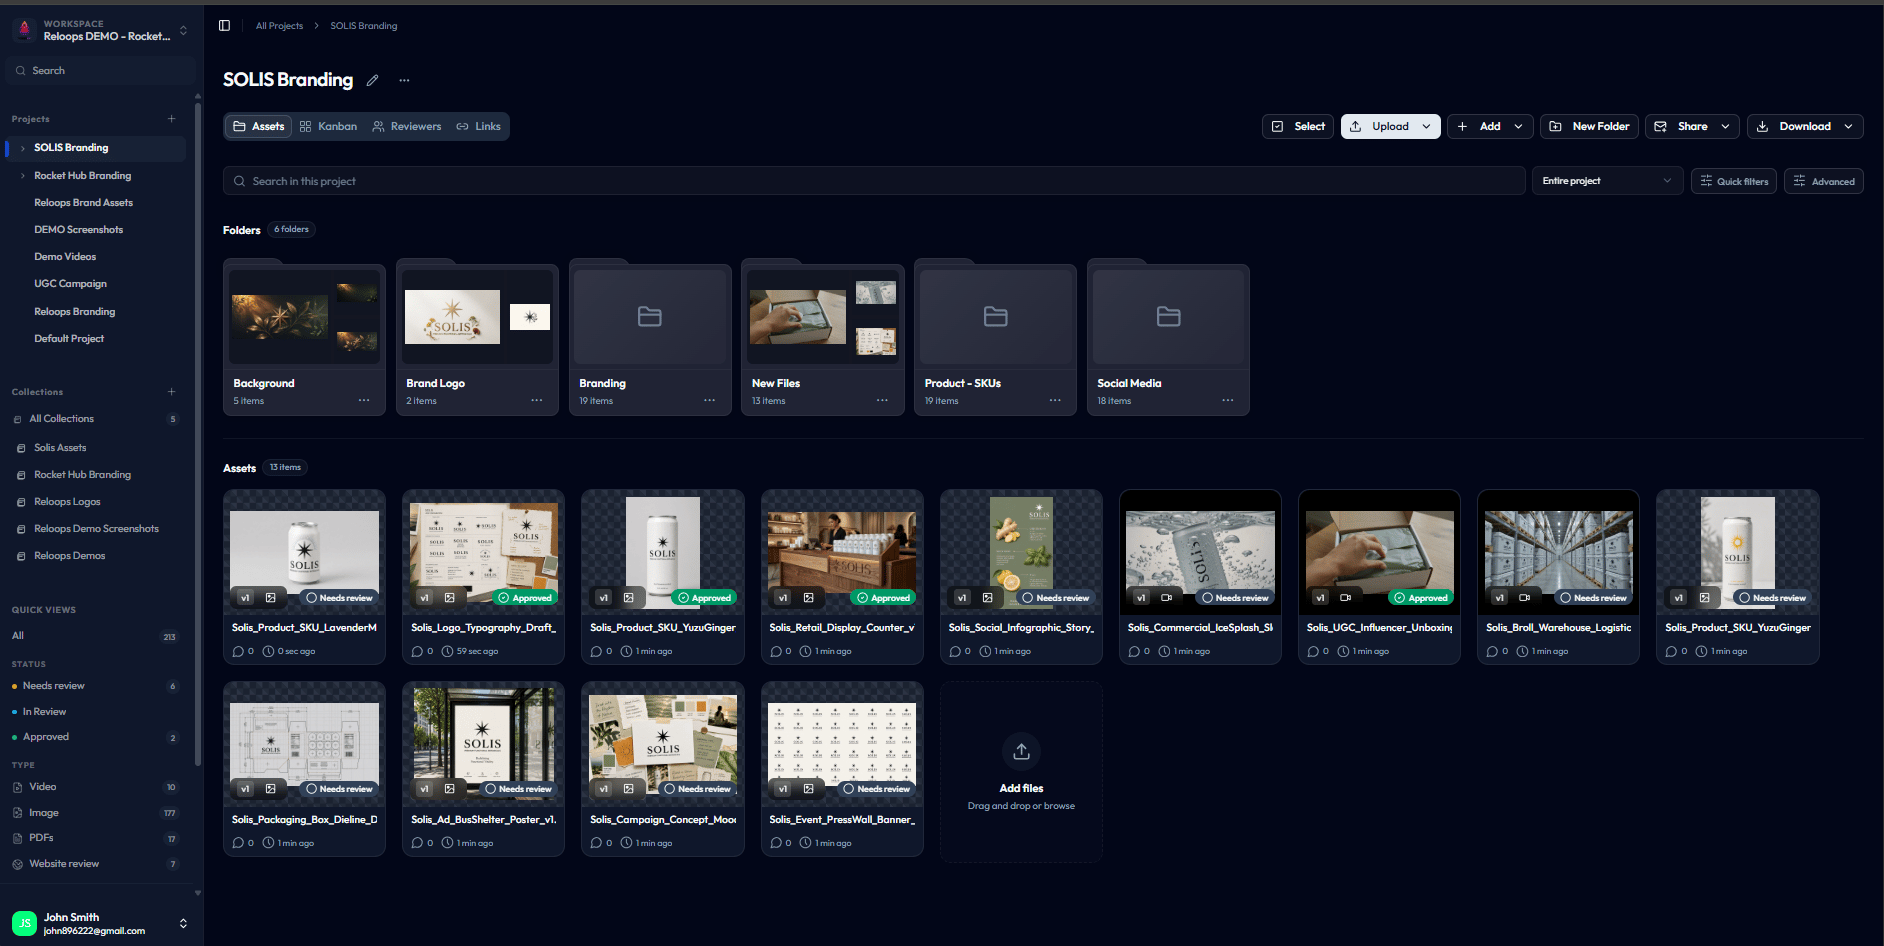
Folders, assets, statuses, and quick filters live together in the Assets view.
- Use Upload for files or folders, Add for existing assets or website captures, New Folder to organize work, and Select for bulk actions.
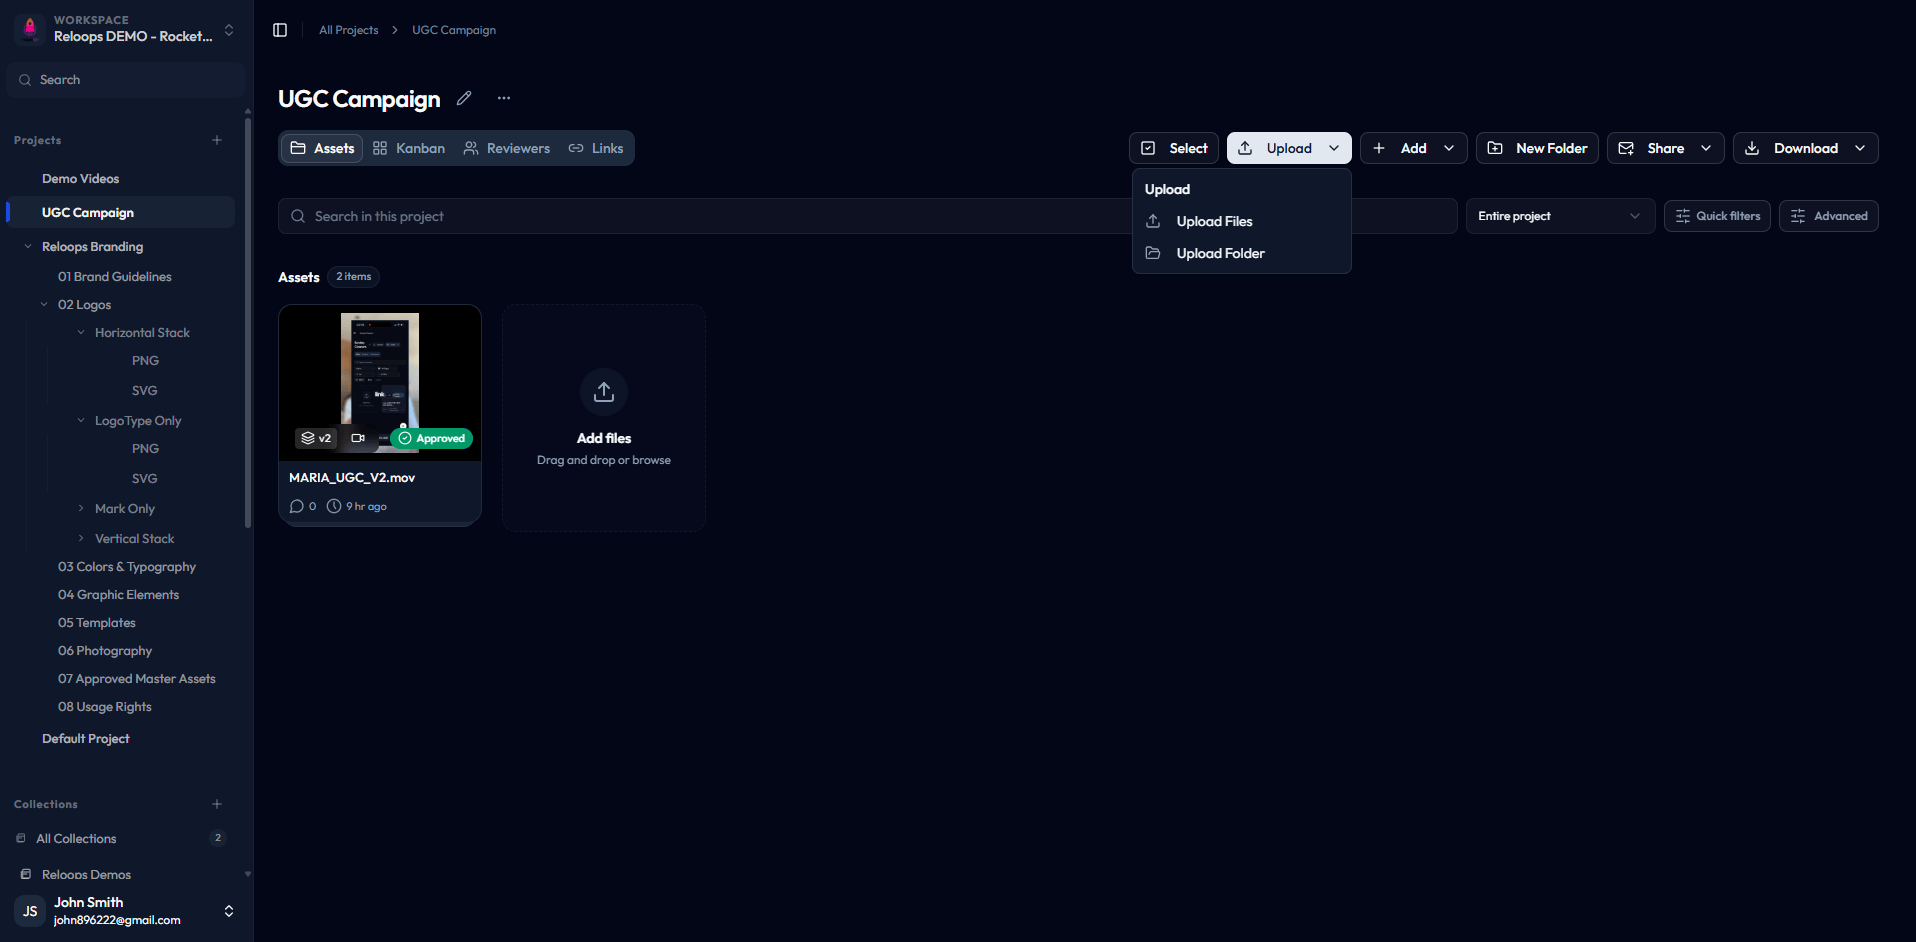
The Upload menu supports file and folder upload.
Kanban Status Board - /workspace/:workspaceId/projects/:projectId
/workspace/:workspaceId/projects/:projectId) groups every asset by its current review status - for example, Needs review, In review, and Approved. Switch to this view when you want a project-wide picture of progress. Drag asset cards between columns to update their status.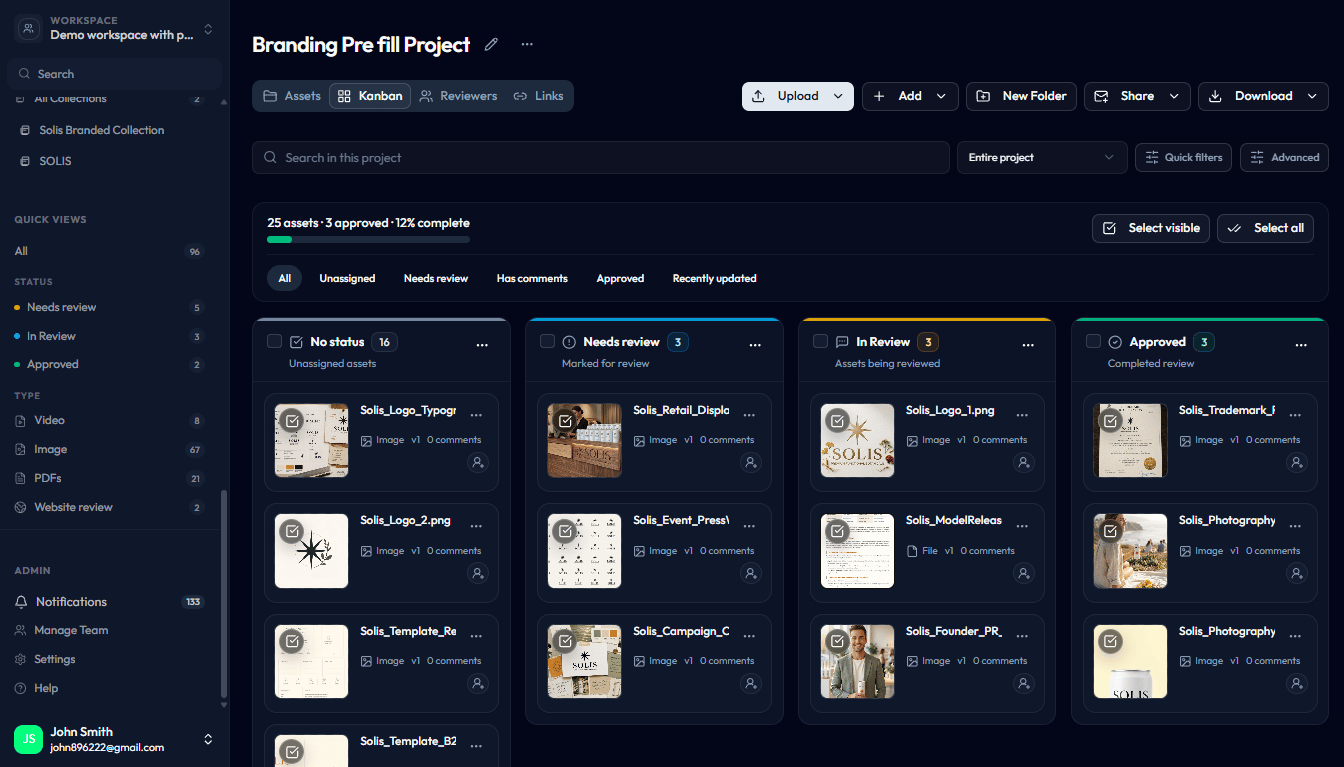
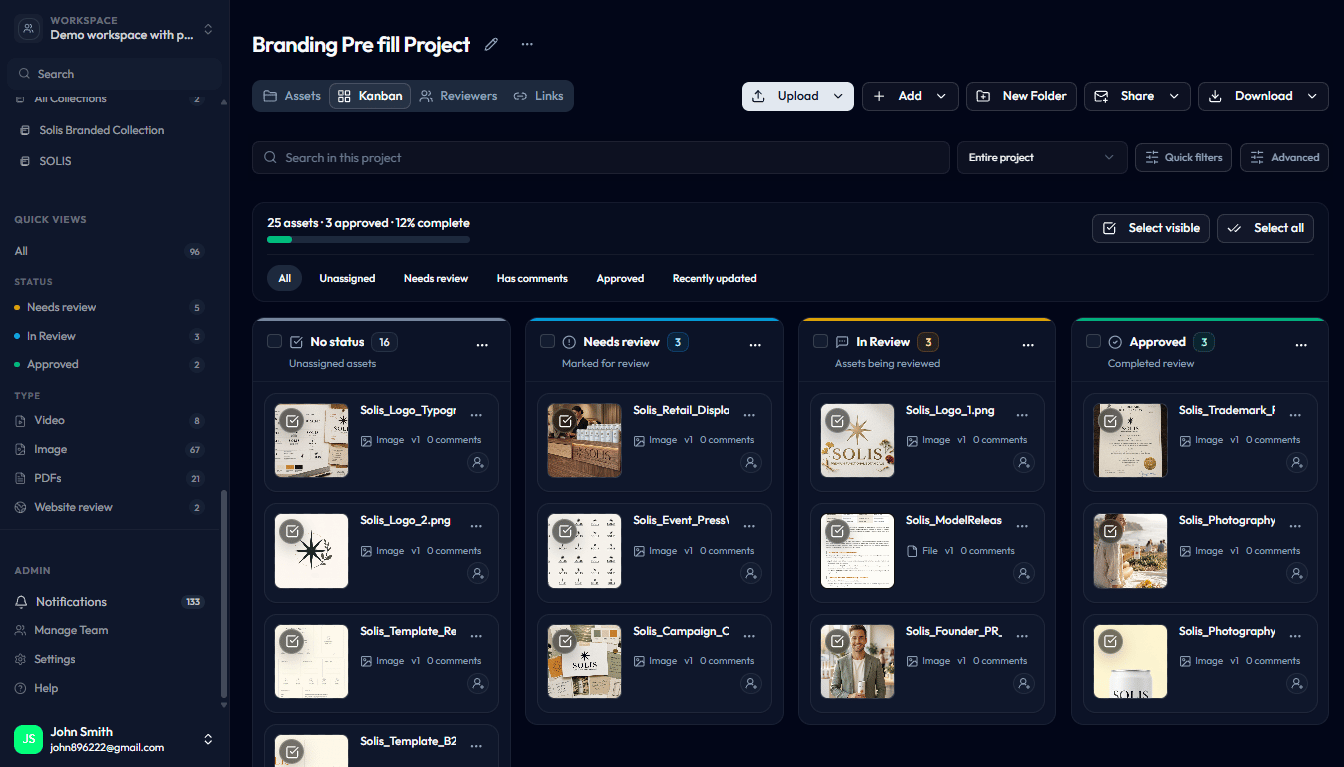
The Kanban board groups review-stage assets by status.
Reviewers and Links Tabs - /workspace/:workspaceId/projects/:projectId
/workspace/:workspaceId/projects/:projectId) live alongside the Assets and Kanban views. Use the Reviewers tab to see every guest reviewer you have added to the project and the assets assigned to them.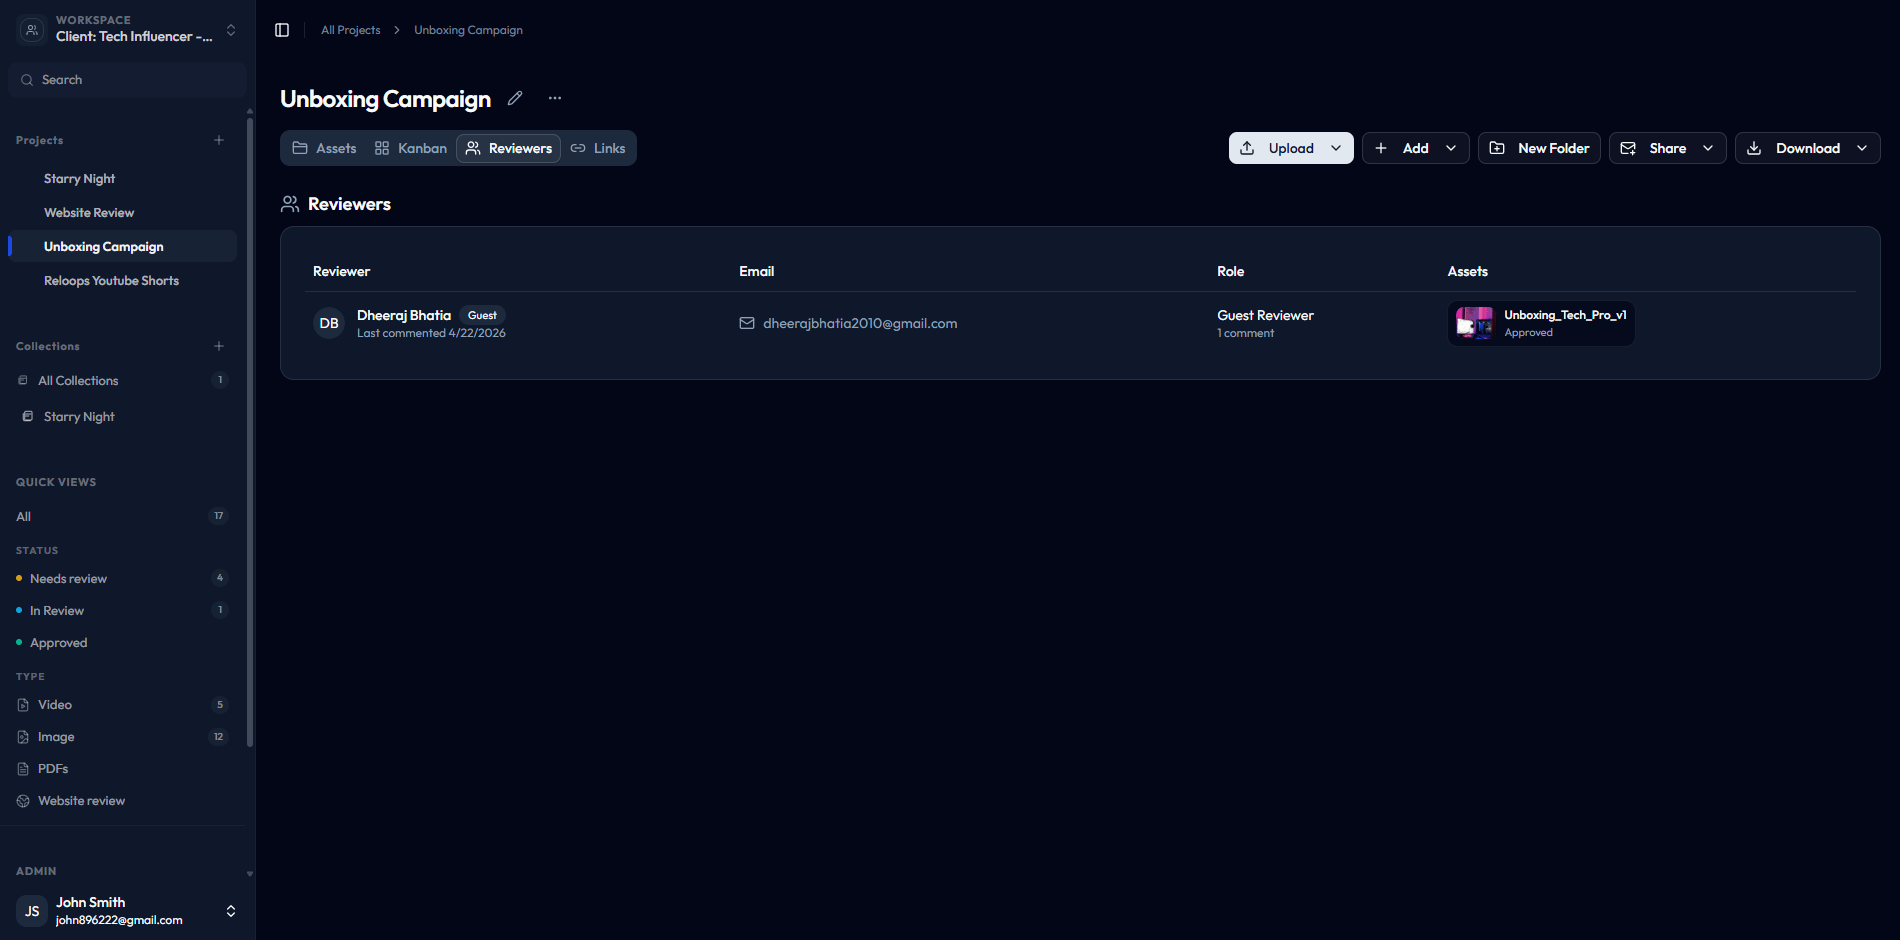
The Links tab audits asset share links for the project.
Use the Links tab to see all active share links created for assets in this project.
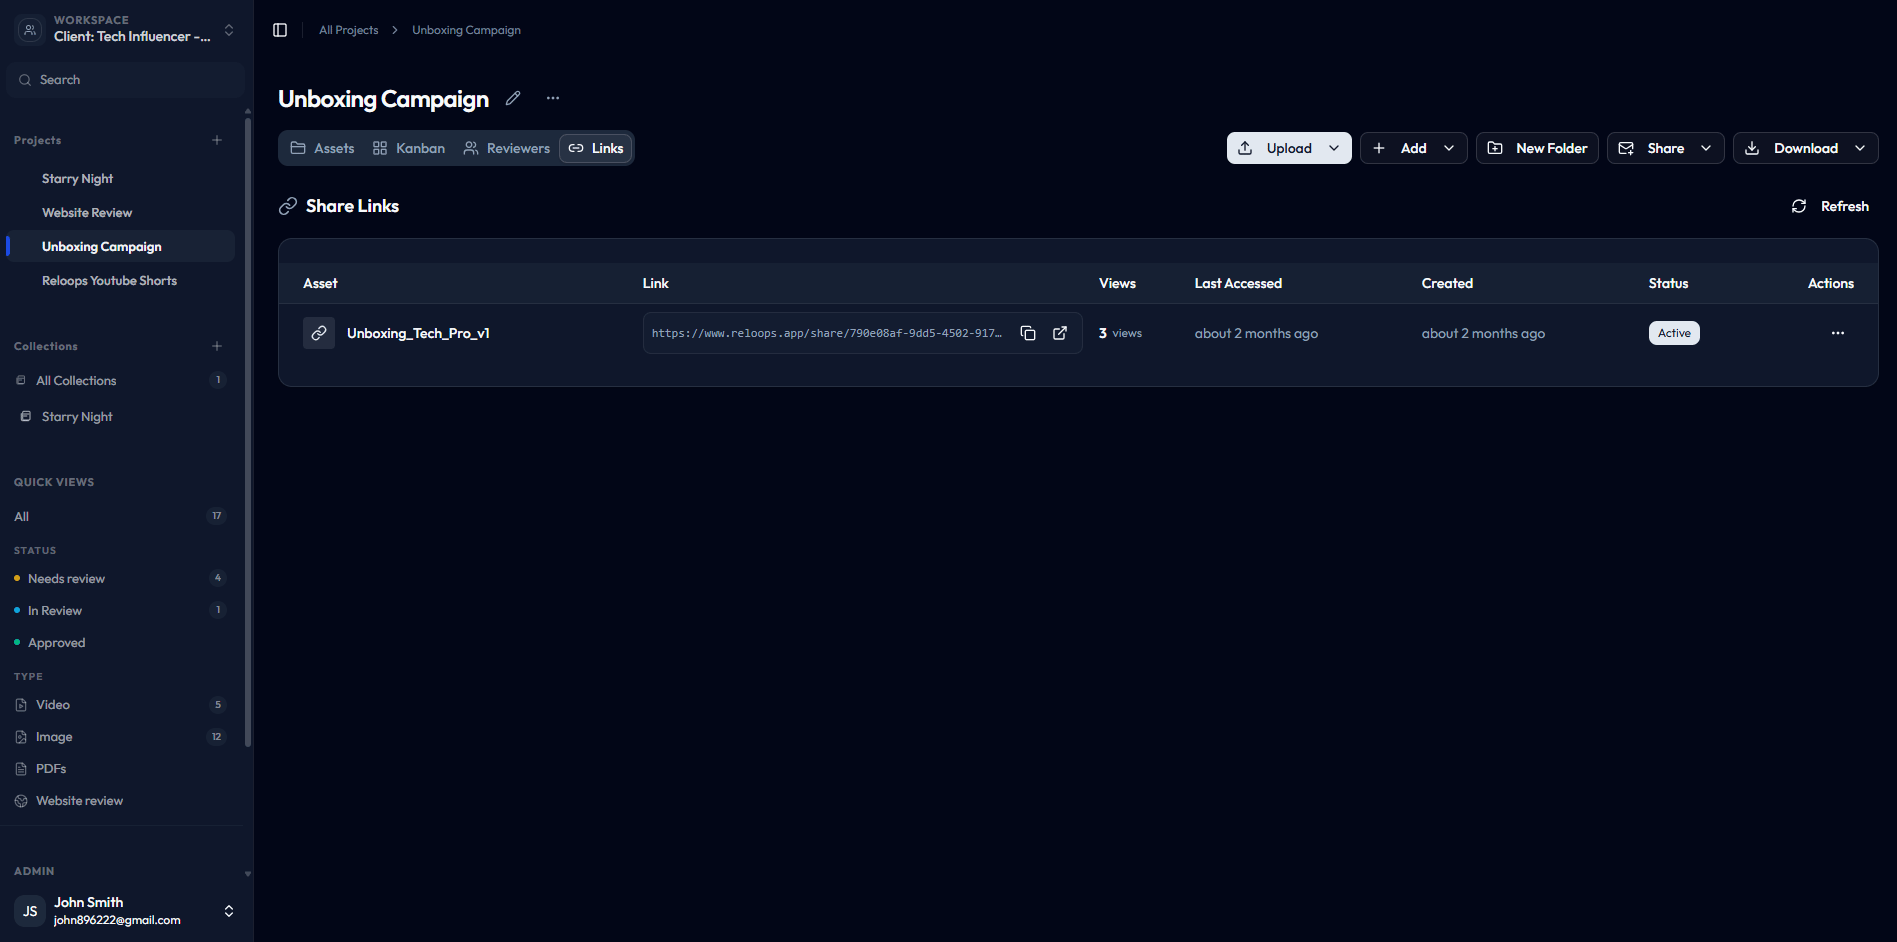
The Links tab audits asset share links for the project.
Collections - /workspace/:workspaceId/collections and /workspace/:workspaceId/collections/:collectionId
/workspace/:workspaceId/collections) lets you build curated visual galleries from assets that already exist in your projects. Open a collection, select a source folder, choose the assets you want to include, and then adjust appearance settings - background, layout, and branding - to match your delivery needs. The source files stay in their original projects.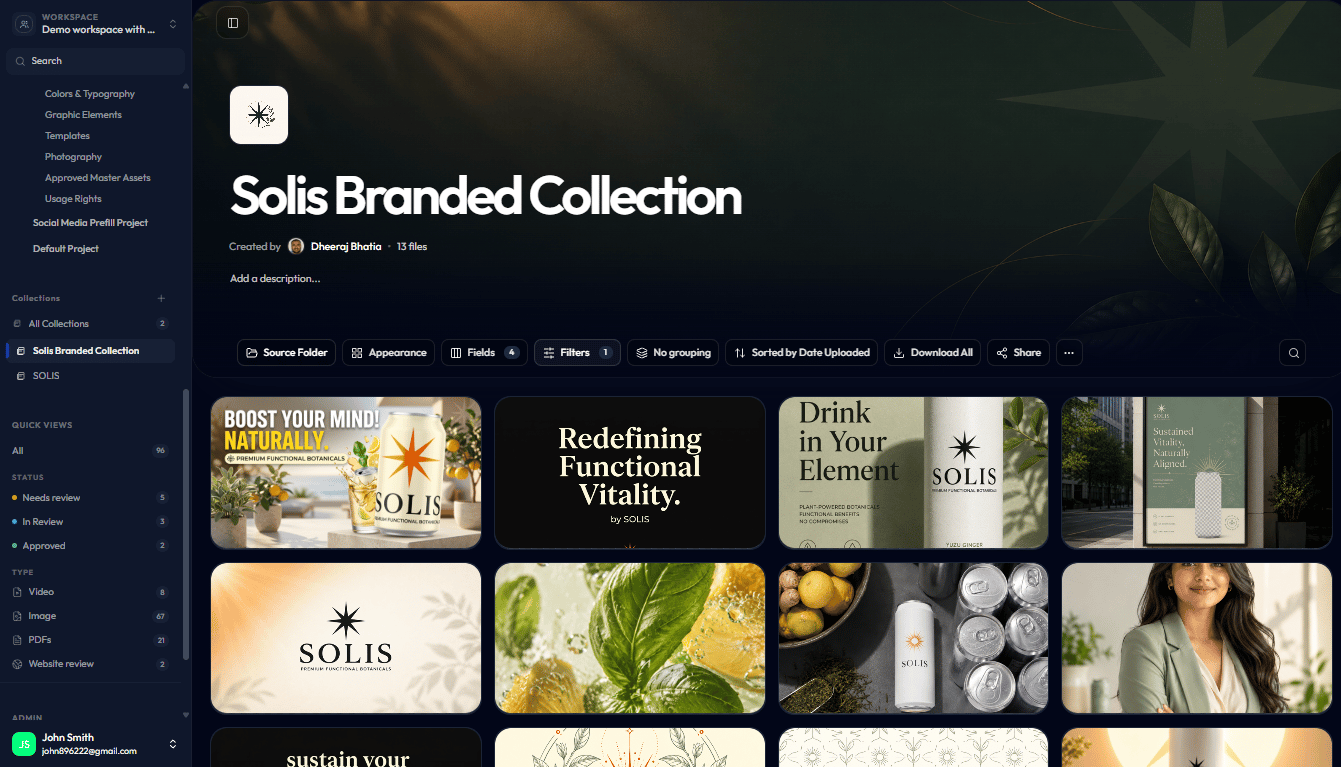
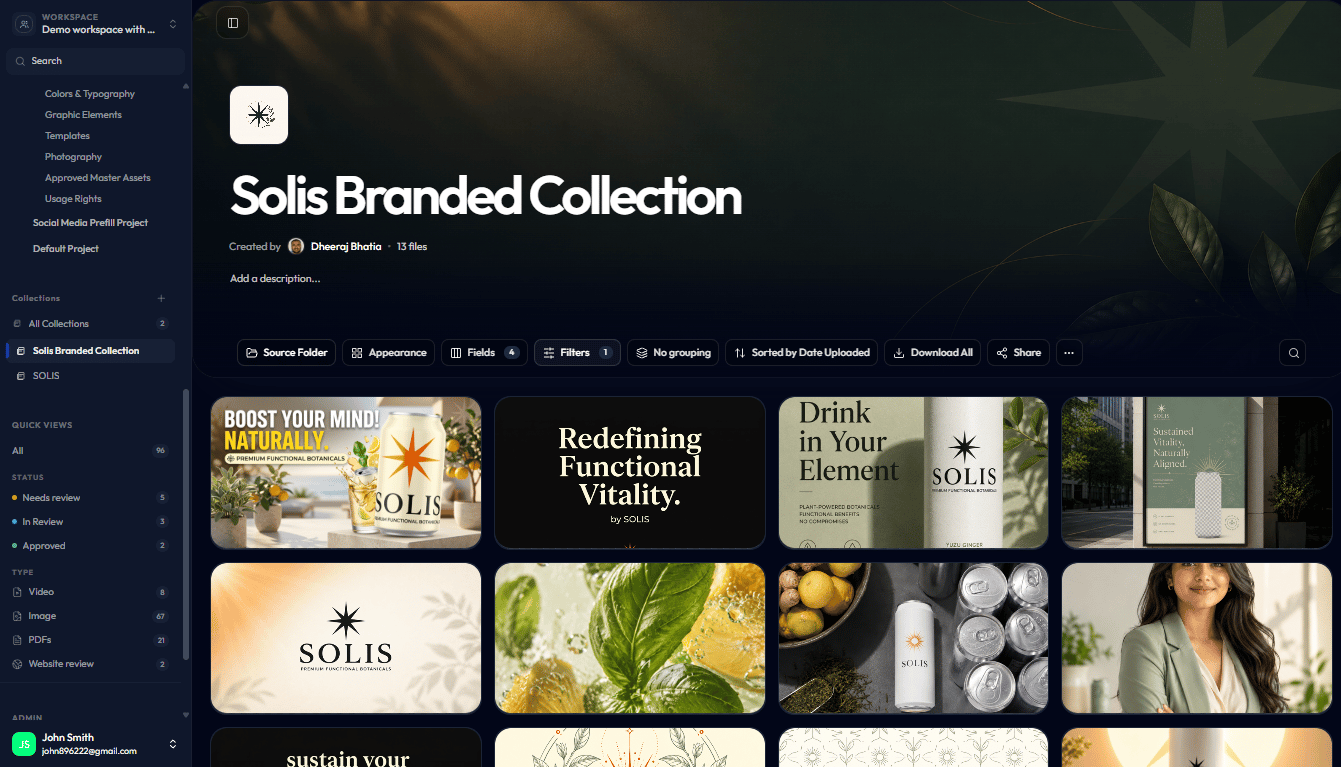
A collection can present selected project assets as a clean gallery.
Asset Review - /workspace/:workspaceId/projects/:projectId/assets/:assetId
/workspace/:workspaceId/projects/:projectId/assets/:assetId) is the core review surface. Open any asset here to play or view the file, leave timestamped or pinned comments, add annotations, assign the asset to a team member, and update its status. Reviewers can approve the asset or request revisions directly from this screen.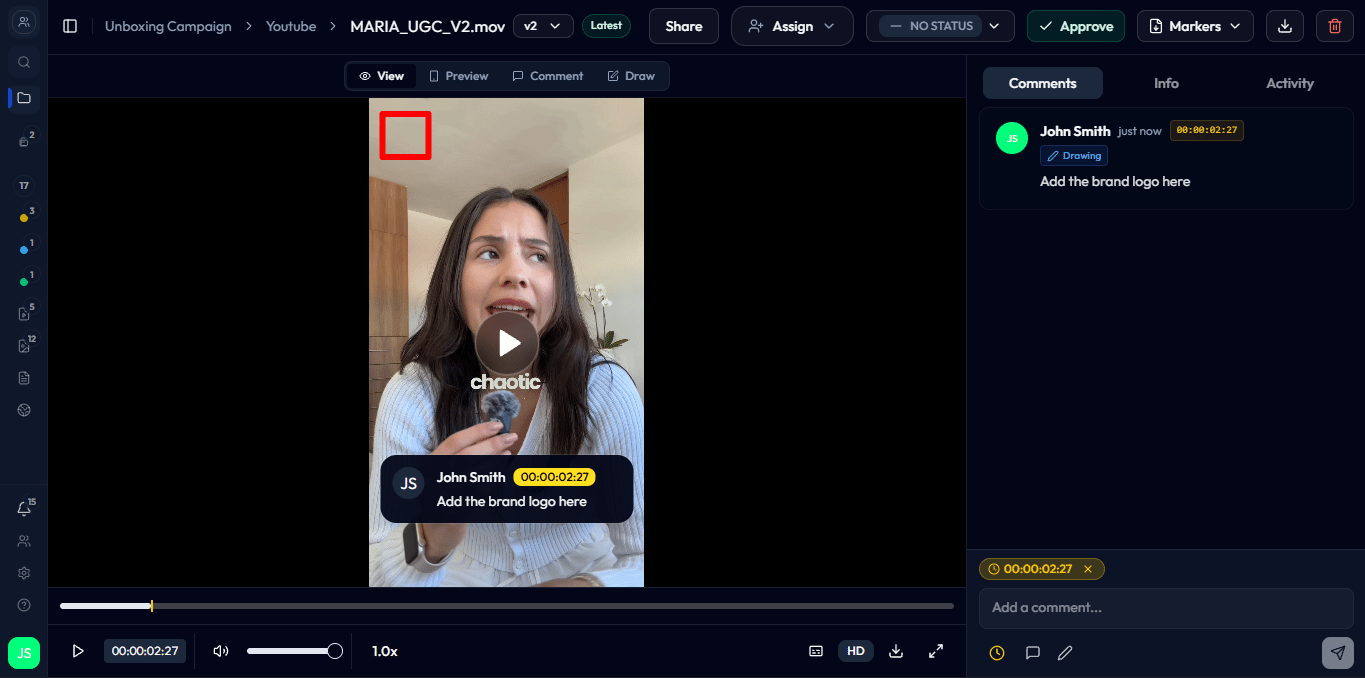
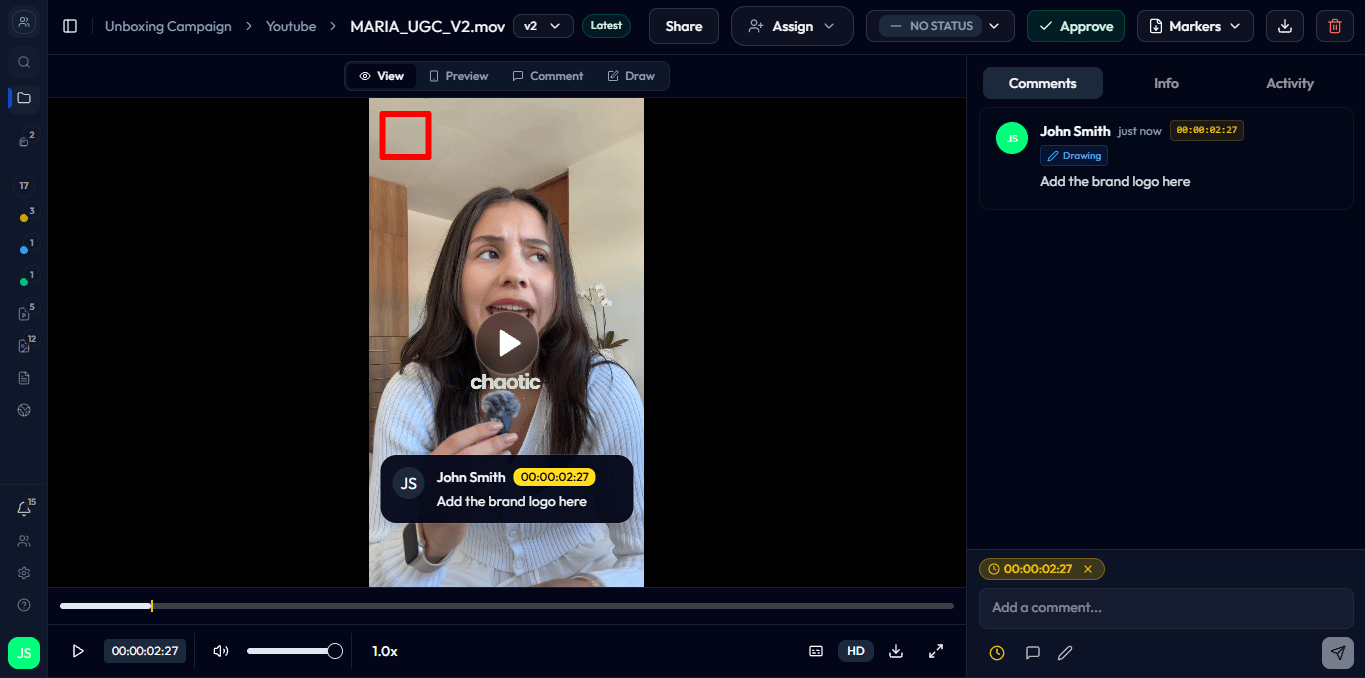
The review surface supports view, comment, and draw modes.
Share an Asset - /workspace/:workspaceId/projects/:projectId/assets/:assetId and /share/:token
/workspace/:workspaceId/projects/:projectId/assets/:assetId) generates a shareable URL for a single asset. Send the link to an external reviewer - they open it at /share/:token and can leave comments without needing a Reloops account. Use this when one file needs focused external feedback rather than full project access.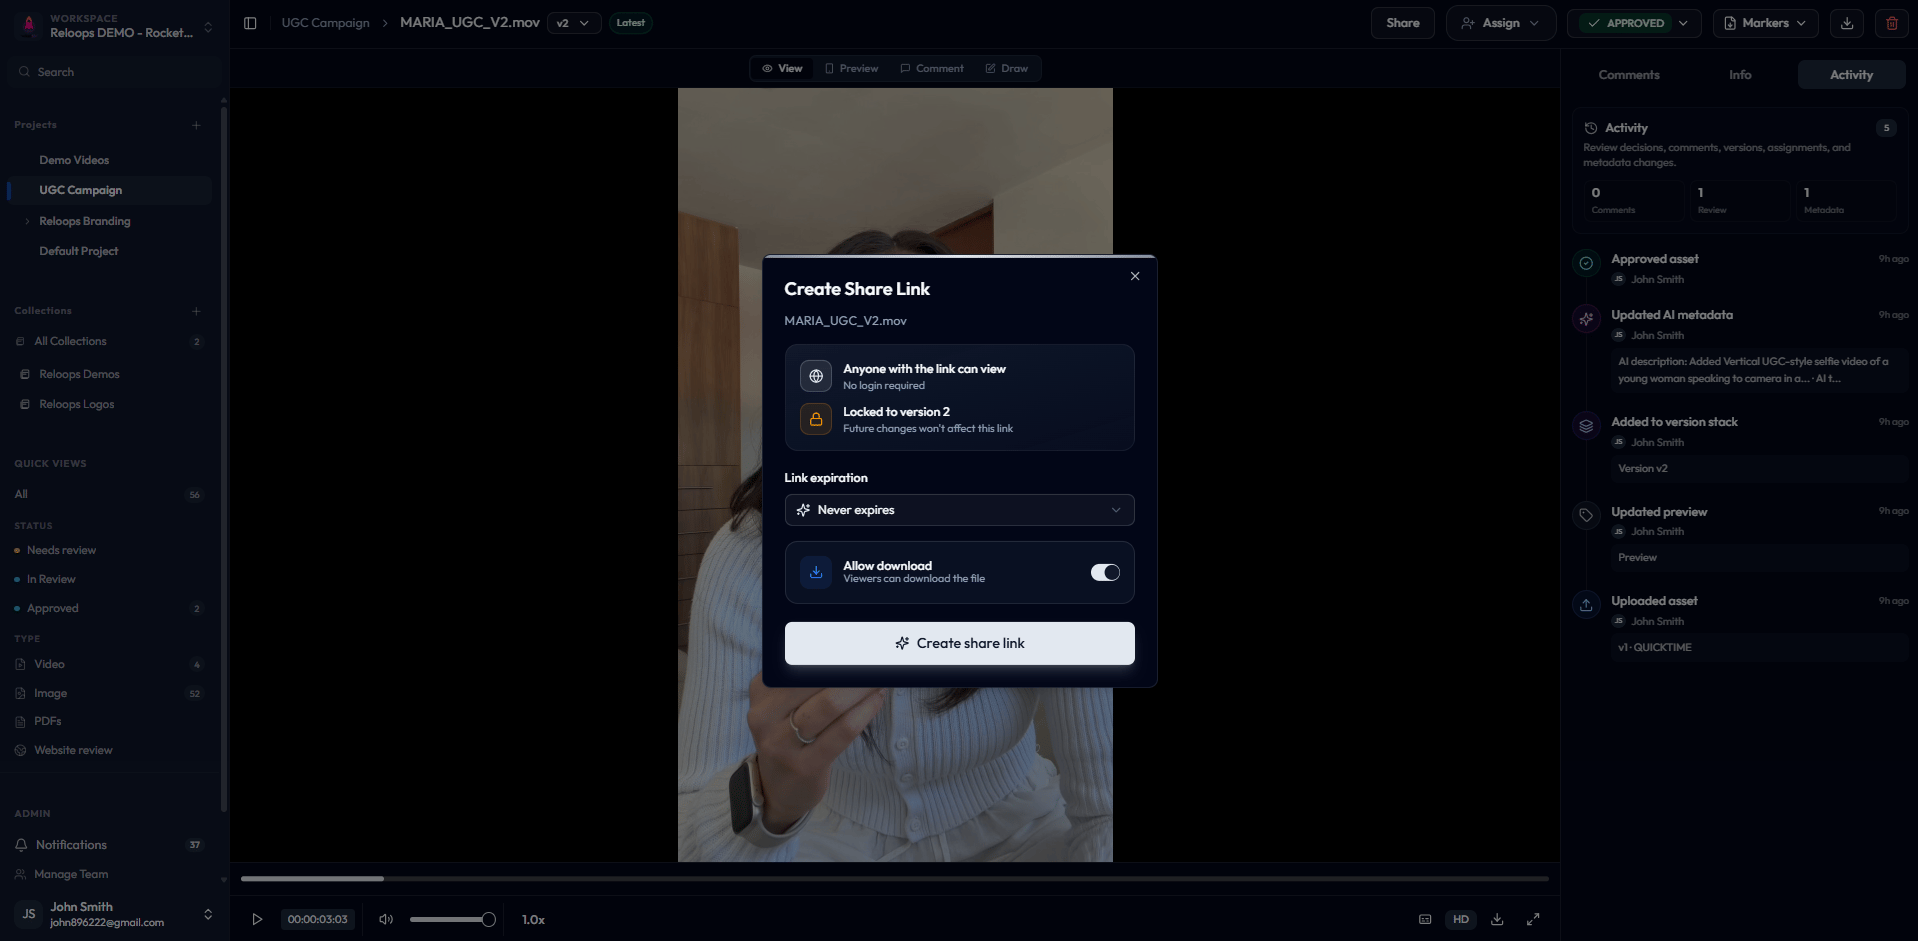
Asset share links are locked to the open version and can allow or block downloads.
Compare Versions - /workspace/:workspaceId/projects/:projectId/assets/:parentAssetId/compare
/workspace/:workspaceId/projects/:projectId/assets/:parentAssetId/compare) displays two versions of an asset side by side. To open it, choose a multi-version asset, click the version pill beside the asset name, such as v2, then select Compare versions. You can also hover a multi-version asset card, open the three-dot menu, and choose Compare.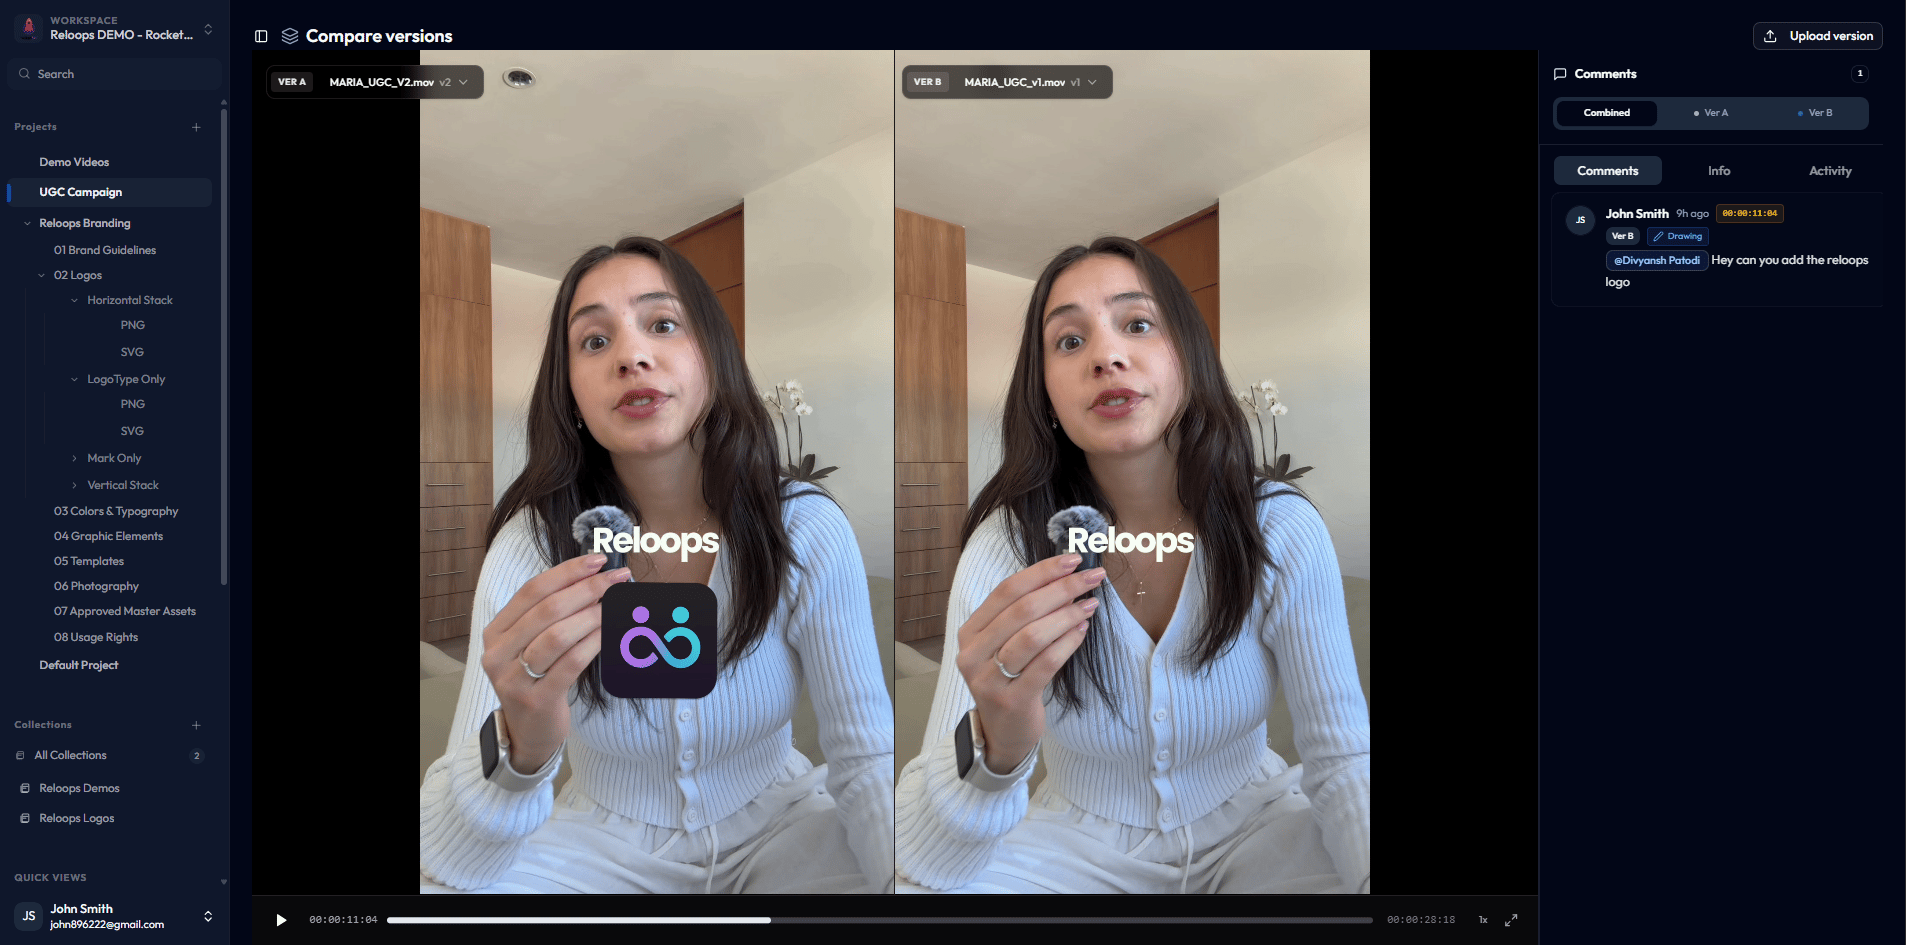
Compare mode keeps version comments visible during before-and-after review.
Website Review - /workspace/:workspaceId/projects/:projectId/assets/:assetId
/workspace/:workspaceId/projects/:projectId/assets/:assetId) uses the same review surface as any other asset, applied to a full-page website capture. Add the URL to capture the page, then leave pinned comments at any point on the screenshot to give precise, context-specific feedback.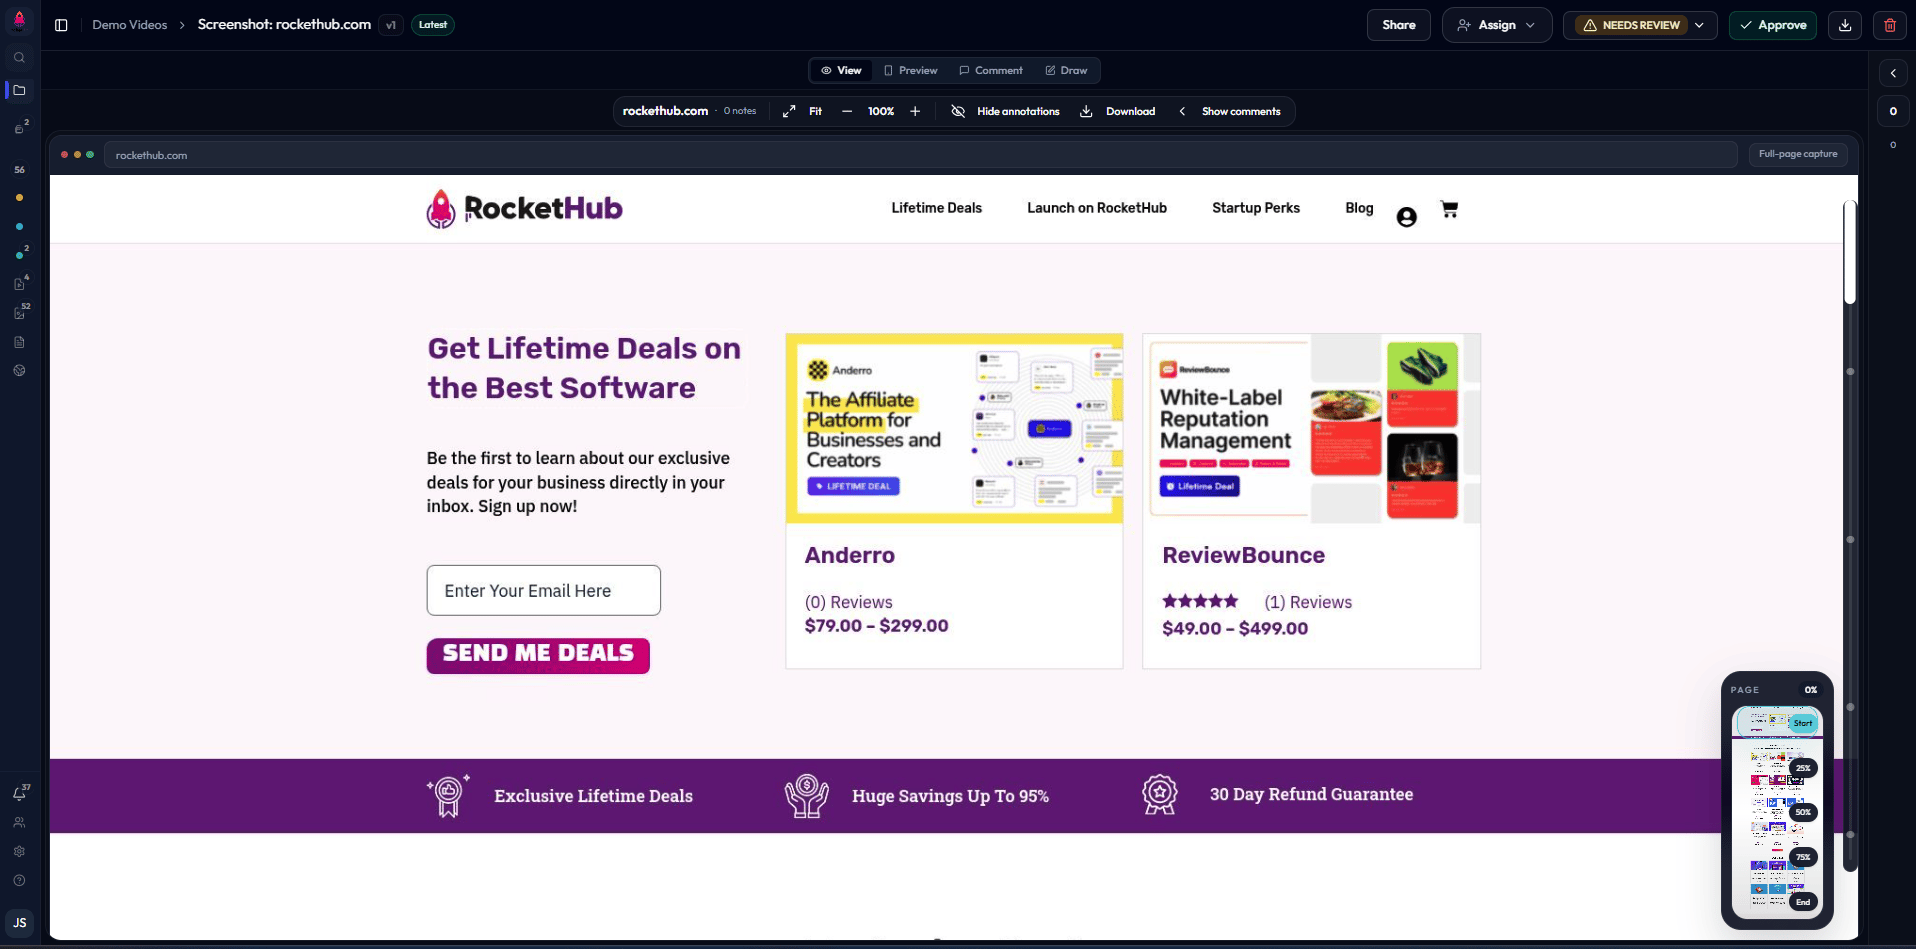
Website review turns a captured page into an annotatable full-page asset.
Notifications, Team, and Settings - /workspace/:workspaceId/teams and /workspace/:workspaceId/settings
/workspace/:workspaceId/teams), and workspace settings (/workspace/:workspaceId/settings) cover the operational side of a workspace. Check notifications to stay on top of review activity and file updates. Use the team page to manage members, project reviewers, AI agents, and developer keys. 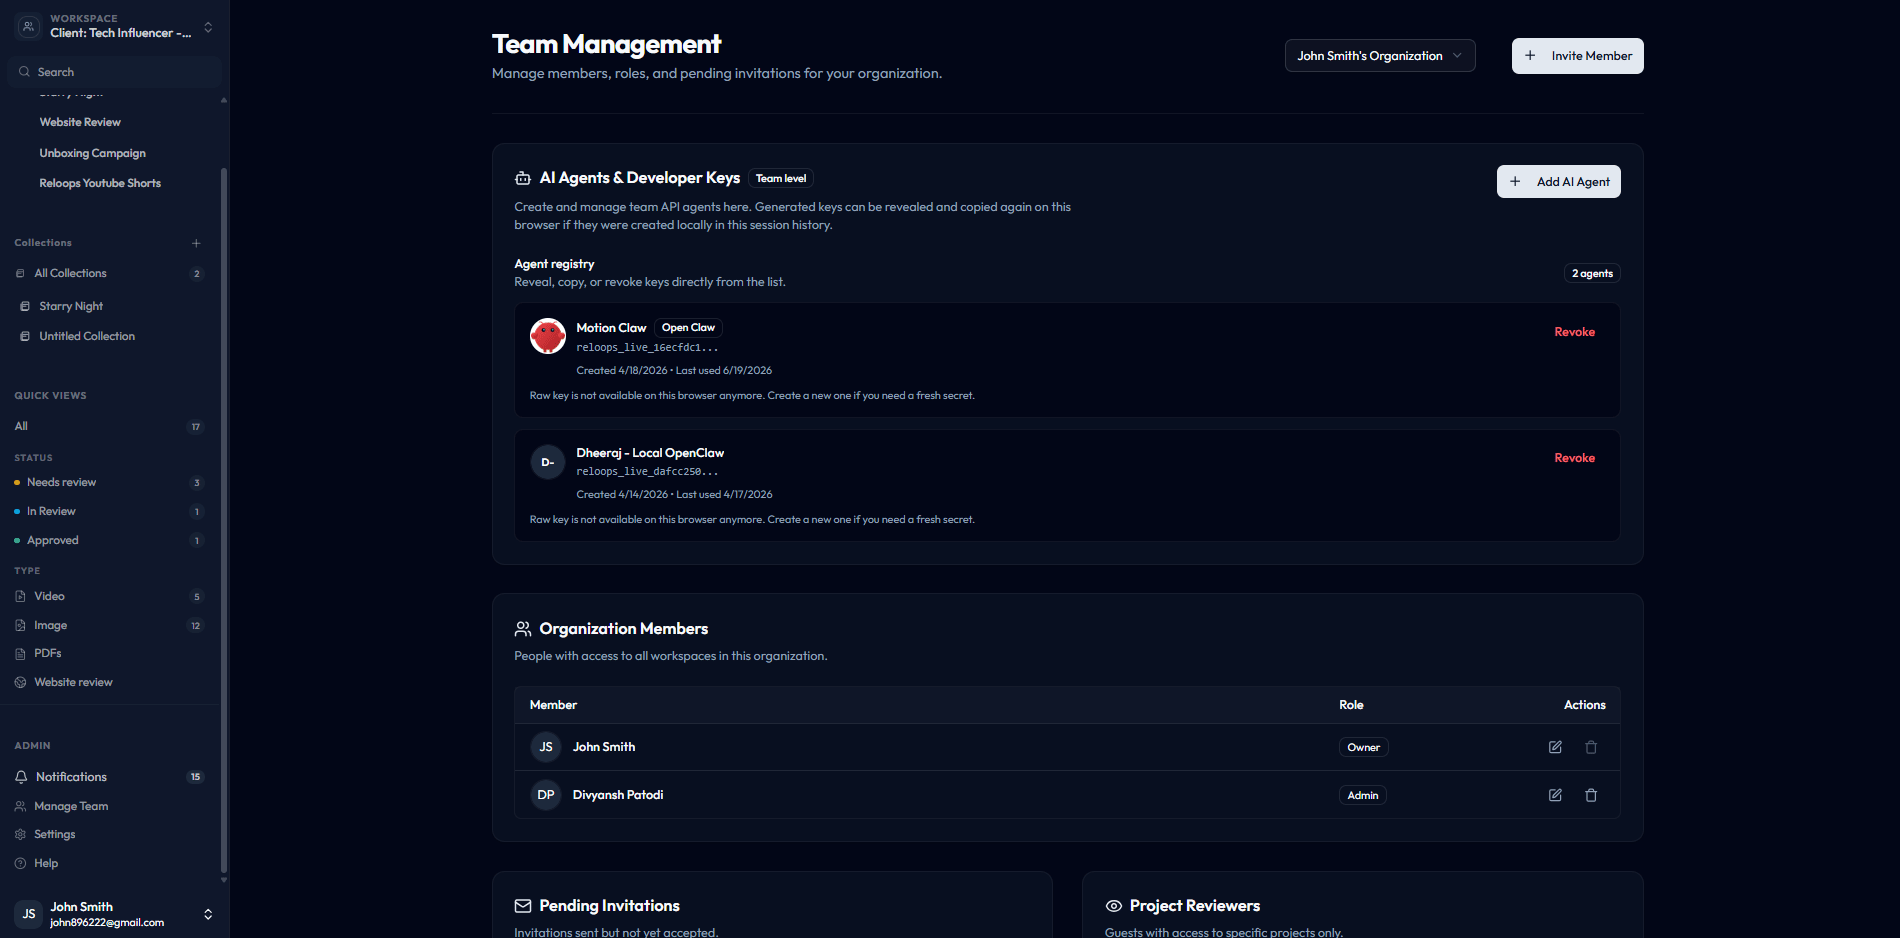
Team management includes AI agents, developer keys, organization members, invitations, and project reviewers.
Use settings to update the workspace profile, review billing limits, monitor storage, and track AI processing.
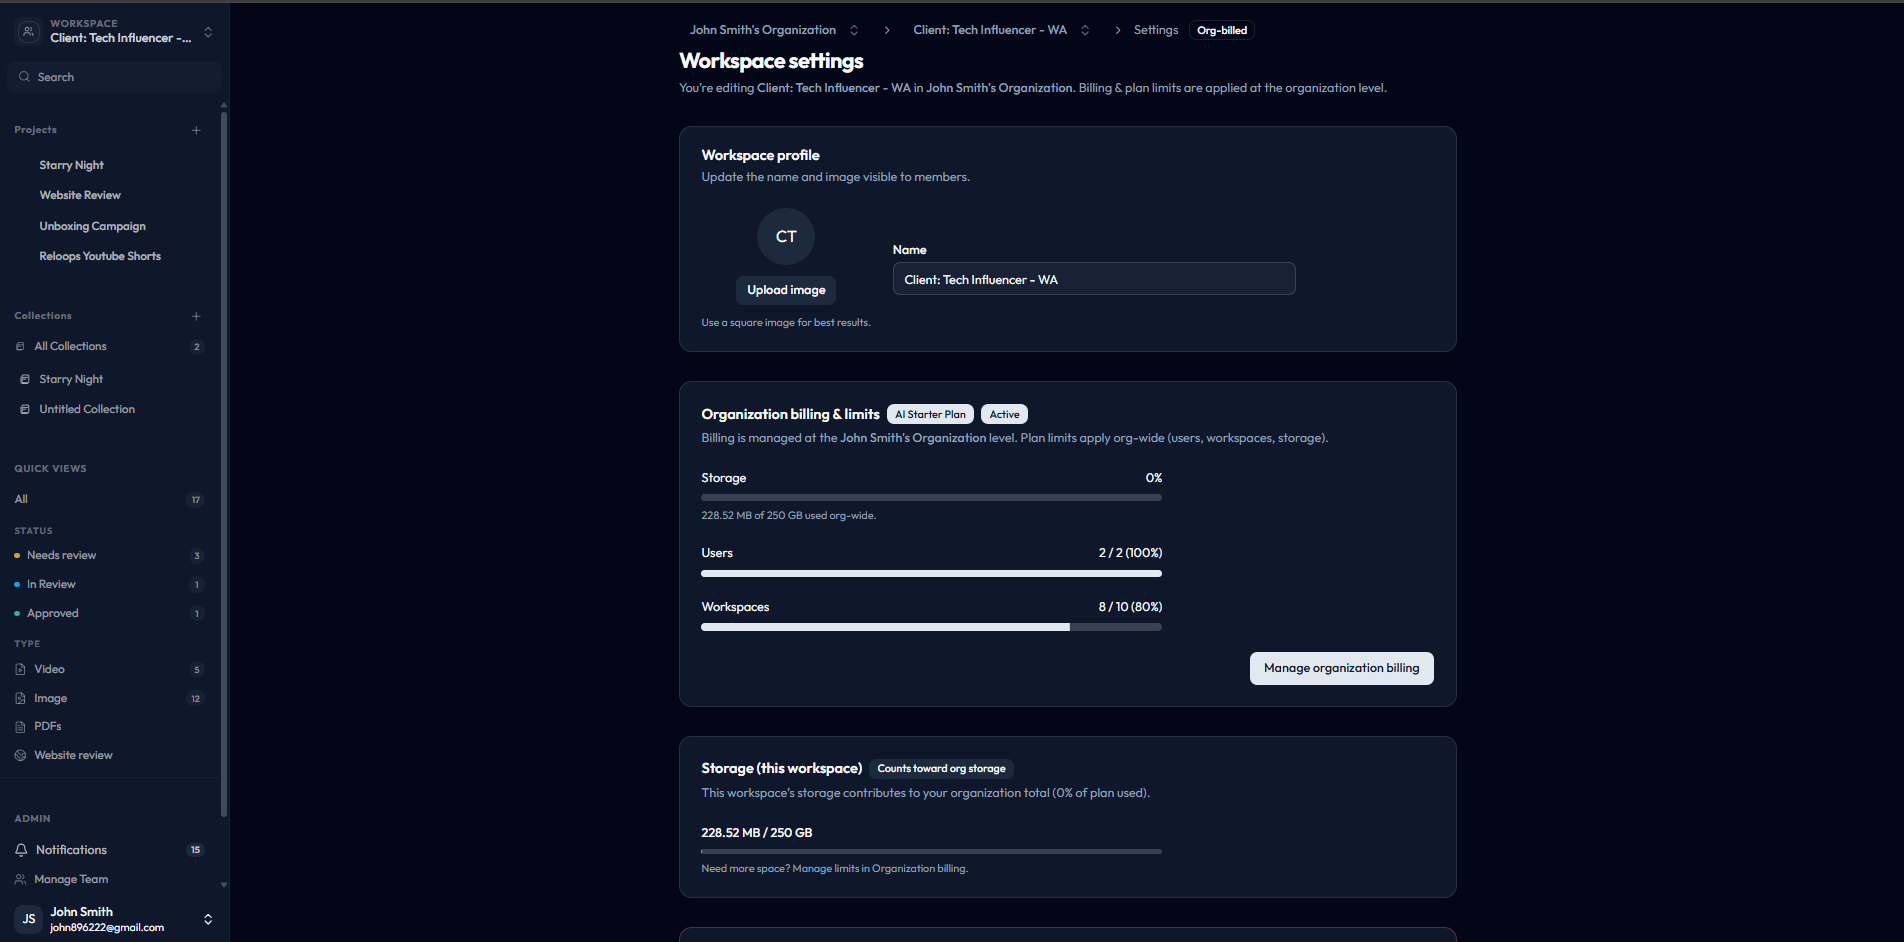
Workspace settings shows plan, storage, and AI processing limits.