> ## Documentation Index
> Fetch the complete documentation index at: https://docs.reloops.app/llms.txt
> Use this file to discover all available pages before exploring further.
# Upload Assets to a Reloops Project: Formats and Steps
> Upload files to a Reloops project using drag and drop, file browser, or folder upload, and learn which formats are supported for review.
Uploading assets is how work begins inside a project. Once a file is uploaded, it becomes an asset that you can preview, comment on, annotate, and track through the review workflow. You can upload at any time - there is no limit on how many times you can add files to an existing project.
## How to upload assets
Open the project you want to add files to, then follow these steps.
Click the project you want to upload files into from the Projects page.
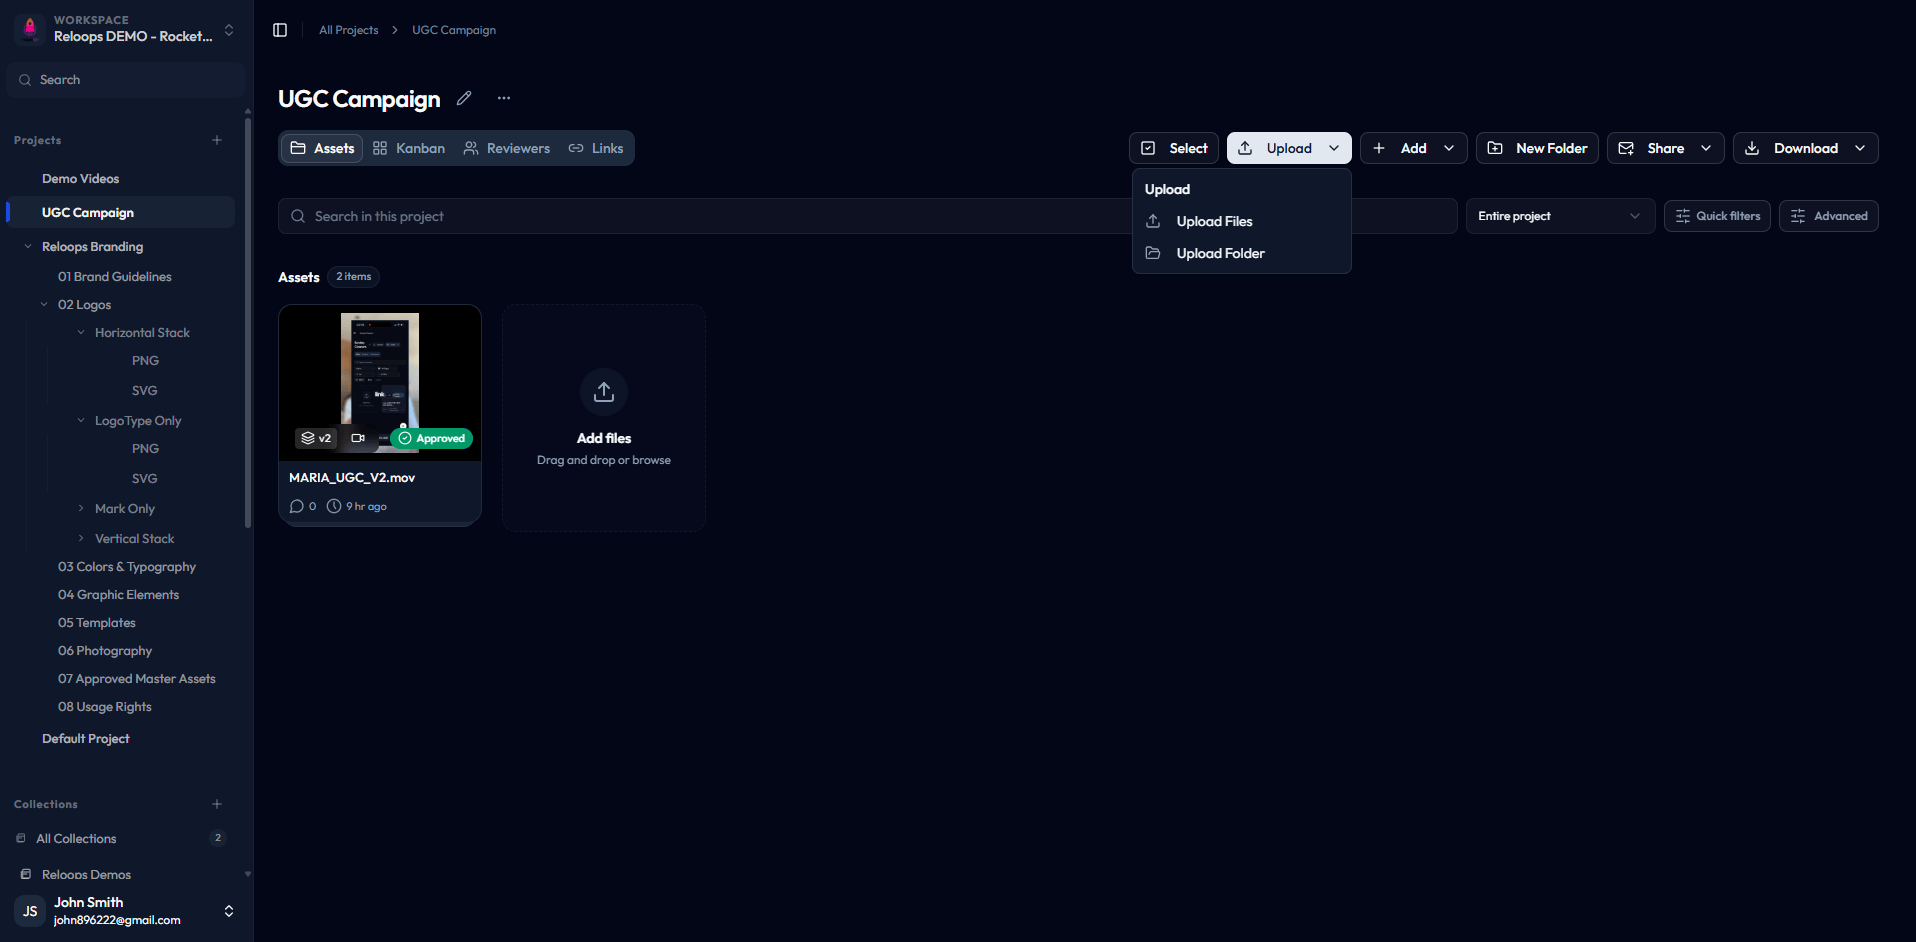
Click the **Upload** button in the top-right corner of the Assets view. This opens the upload options menu.
Choose **Upload Files** to select individual files, or **Upload Folder** to preserve a local folder hierarchy.
Either drag files from your computer and drop them into the upload area, or click **Browse files** to open your device's file picker and select files manually. Both methods support uploading multiple files at once.
Each file appears as an asset card in the Assets view as soon as it finishes uploading. Large batches process quickly, so you can upload many files at once without waiting.
## Supported file formats
Reloops supports common creative file types. Images, videos, PDFs, and website captures get dedicated review surfaces. Audio, text, and data files can still be stored, organized, downloaded, tagged, and shared as project assets.
JPG, PNG, GIF, WEBP, and SVG files can be reviewed, annotated, commented on, shared, and compared.
MP4, MOV, M4V, WEBM, and MKV files support playback, timecoded comments, thumbnails, sharing, and compare mode.
PDFs get a dedicated review surface. Audio, text, CSV, and JSON files can be uploaded as project assets.
For the full extension, MIME type, upload limit, and processing reference, see [Supported file types and extensions](/projects/supported-file-types).
## What happens after upload
After your files finish uploading:
* Each file becomes an **asset** inside the project.
* Assets appear immediately as cards in the **Assets view**.
* Every asset starts with a status of **No status** by default.
* Assets are searchable, filterable, and ready to be assigned for review.
From the asset card you can open the full review interface to start leaving comments and annotations.
## Upload a new version
When a new upload is a revision of an existing asset, keep it in the same version stack instead of leaving it as a separate card.
Upload the new file into the project and wait until its asset card appears in the Assets view.
Drag the new asset card onto the original asset card. Reloops assigns the next version number and keeps the stack in the original asset's project and folder.
Open the stacked asset to switch versions, manage the stack, or enter compare mode.
For details, see [Version History and Compare Mode](/review/version-history-and-compare).
**Upload tips for a smoother review round:**
* Confirm you are inside the best starting project before uploading. You can move or copy assets later, but the right starting location keeps the first review round clearer.
* Use clear, descriptive file names so teammates can identify assets without opening each one.
* Upload related files together in a single batch to keep the Assets view tidy and reviews organized.
* Use **Upload Folder** when your files are already organized into folders on your computer - it preserves the folder grouping inside the project.
 ## Supported file formats
Reloops supports common creative file types. Images, videos, PDFs, and website captures get dedicated review surfaces. Audio, text, and data files can still be stored, organized, downloaded, tagged, and shared as project assets.
## Supported file formats
Reloops supports common creative file types. Images, videos, PDFs, and website captures get dedicated review surfaces. Audio, text, and data files can still be stored, organized, downloaded, tagged, and shared as project assets.