> ## Documentation Index
> Fetch the complete documentation index at: https://docs.reloops.app/llms.txt
> Use this file to discover all available pages before exploring further.
# Project Assets View: Browse and Manage Files in Reloops
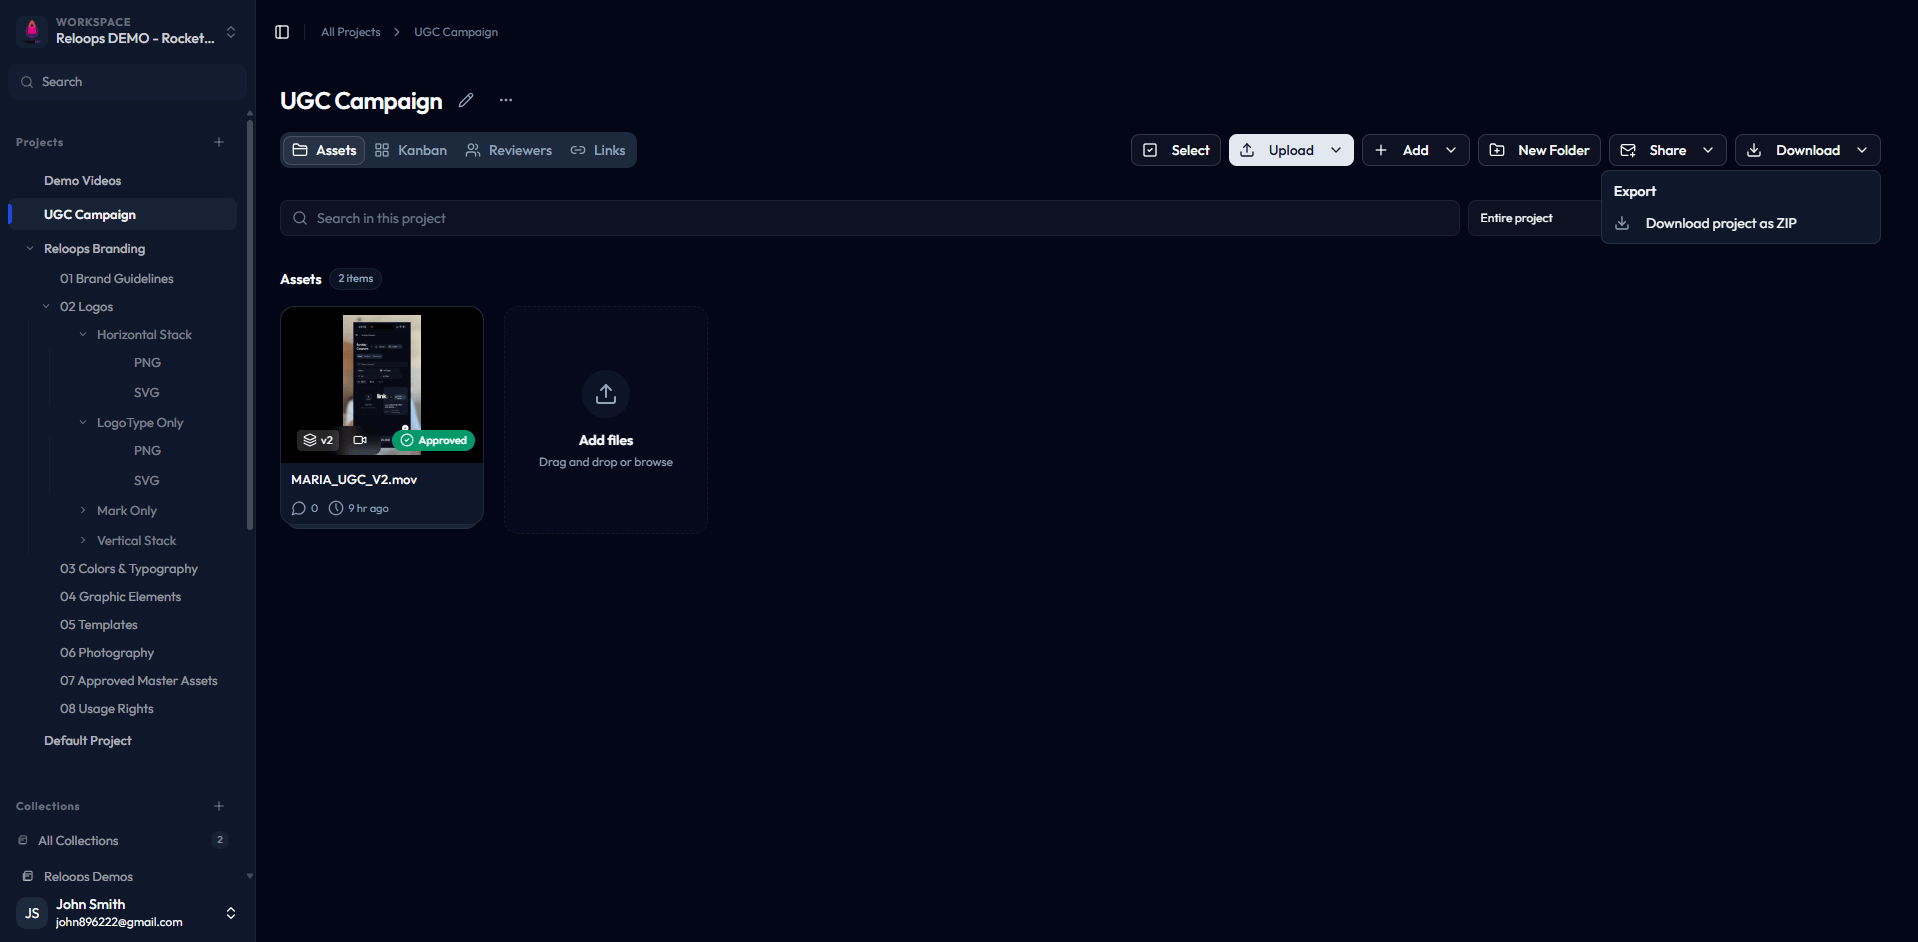
> Use the Assets view to browse, upload, open for review, and track every file inside a Reloops project - all from one central workspace.
The Assets view is the main file workspace inside a project. Every time you enter a project, this is where you land - it gives you a full picture of all uploaded assets and the tools to take action on them without navigating away.
**App route:** `/workspace/:workspaceId/projects/:projectId`
## What you can do from the Assets view
The Assets view is your starting point for all project file work. From here you can:
* **Start uploads** - add files or whole folders to the project at any time.
* **Add existing assets** - attach an asset stack that already exists elsewhere in the workspace.
* **Capture web pages** - create a reviewable website snapshot from a live URL.
* **Create folders** - organize uploaded work into nested folders.
* **Open assets for review** - click any asset card to open the full review interface where you can preview, comment, annotate, and manage the file.
* **Browse assets as cards** - scan thumbnails, version chips, assignees, comments, and status badges in the Assets view to quickly find what you need.
* **Create version stacks** - drag a revised asset card onto the original asset card when the new file is the next version of the same work.
* **Share assets** - generate share links or invite reviewers directly from the view.
* **Run bulk actions** - select assets or folders, then copy, move, download, or remove them from the project.
* **Track review progress** - switch to the Kanban view to see how assets are distributed across review stages.
 ## Upload options
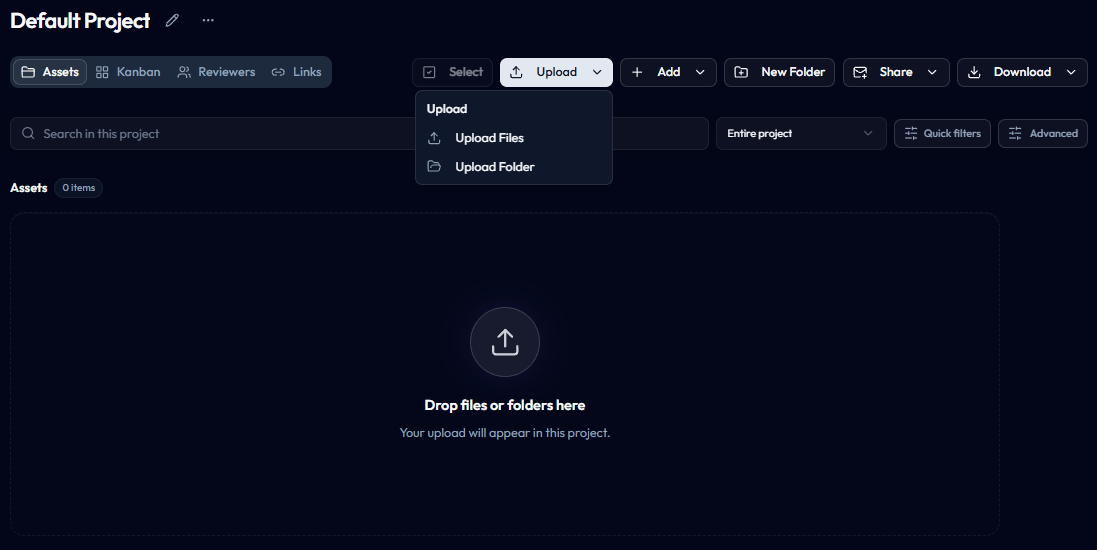
When you click the **Upload** button, you get two choices:
| Option | What it does |
| ----------------- | ------------------------------------------------------------------------------------ |
| **Upload Files** | Adds one or more individual files you select from your device. |
| **Upload Folder** | Uploads an entire folder and keeps its contents grouped together inside the project. |
Choose **Upload Folder** when your files are already organized into subfolders on your computer and you want to preserve that structure in Reloops.
## Upload options
When you click the **Upload** button, you get two choices:
| Option | What it does |
| ----------------- | ------------------------------------------------------------------------------------ |
| **Upload Files** | Adds one or more individual files you select from your device. |
| **Upload Folder** | Uploads an entire folder and keeps its contents grouped together inside the project. |
Choose **Upload Folder** when your files are already organized into subfolders on your computer and you want to preserve that structure in Reloops.
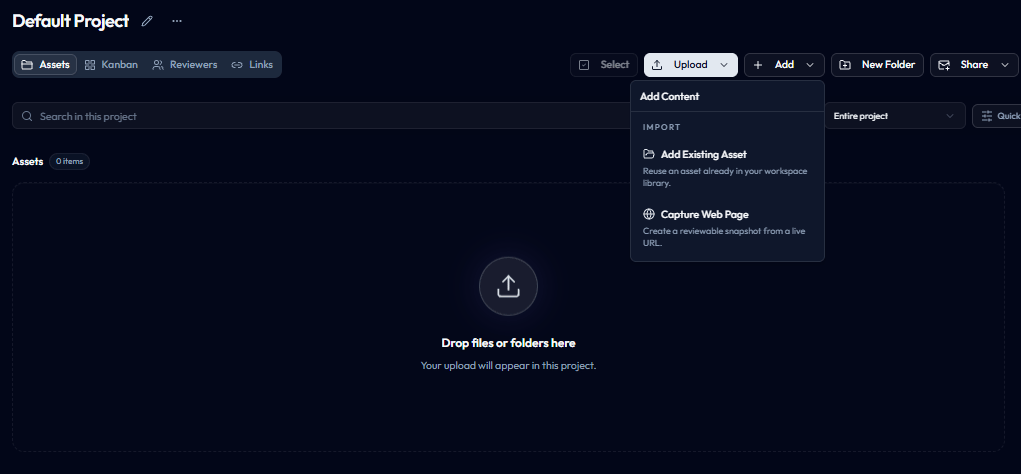
 Use the **Add** menu for non-upload actions:
| Option | What it does |
| ---------------------- | ------------------------------------------------------------------------------------- |
| **Add Existing Asset** | Searches your workspace library and attaches an existing asset stack to this project. |
| **Capture Web Page** | Creates a website review asset from a live URL. |
Use the **Add** menu for non-upload actions:
| Option | What it does |
| ---------------------- | ------------------------------------------------------------------------------------- |
| **Add Existing Asset** | Searches your workspace library and attaches an existing asset stack to this project. |
| **Capture Web Page** | Creates a website review asset from a live URL. |
 For bulk transfer workflows, see [Bulk Actions and Asset Reuse](/projects/bulk-actions-and-asset-reuse).
## Opening asset cards
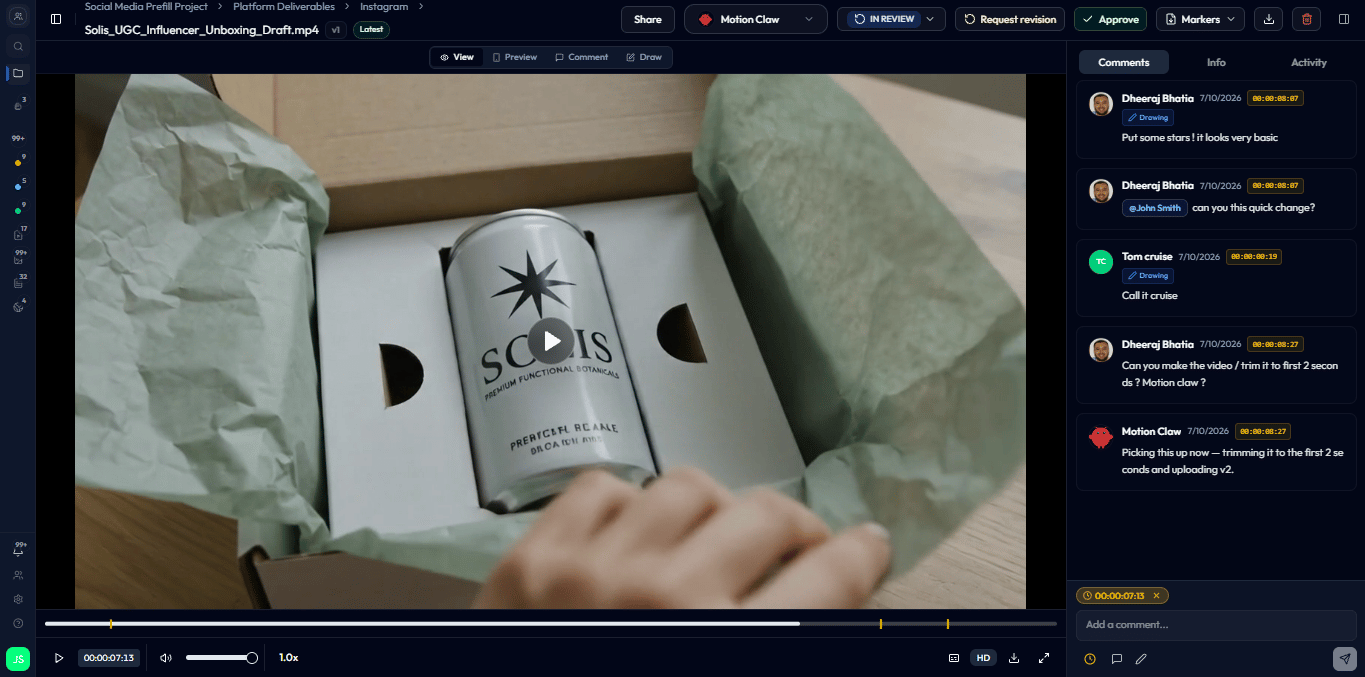
Every uploaded file appears as a card in the Assets view. The card shows a thumbnail, the file name, and the current status badge. Click any card to open the asset and access the full review interface, where you can:
* Preview the file.
* Leave or reply to comments.
* Add visual annotations.
* Assign the asset to a teammate.
* Update the review status.
* Share the asset with external reviewers.
For bulk transfer workflows, see [Bulk Actions and Asset Reuse](/projects/bulk-actions-and-asset-reuse).
## Opening asset cards
Every uploaded file appears as a card in the Assets view. The card shows a thumbnail, the file name, and the current status badge. Click any card to open the asset and access the full review interface, where you can:
* Preview the file.
* Leave or reply to comments.
* Add visual annotations.
* Assign the asset to a teammate.
* Update the review status.
* Share the asset with external reviewers.
 To turn a revised upload into a new version, wait for the upload to finish, then drag the new asset card onto the original card. The stack keeps comments, version numbers, and compare mode under one asset. See [Version History and Compare Mode](/review/version-history-and-compare) for the full workflow.
For the complete walkthrough of uploading files, see [Upload Assets](/projects/upload-assets).